It doesn’t matter if it’s the first or the 20th year teaching, the feeling of the butterflies in the stomach always comes back on the first day of school, and I had mine this week!
Every year I have new students so I put together a book or a powerpoint. This year I decided to go with a Prezi presentation – I used the free version. I included pictures of my family and Colombia and shared them with my students. I used this with my second and third grade classes. At the end of my presentation we played a game called “Falso o Cierto,” and it was basically questions about my presentation. I asked questions such as ¿Es tu maestra de español de Costa Rica?, ¿En la familia de tu maestra de español hay 5 personas? and the children had to answer if it was false or true. They seemed to enjoy playing this game. Many of them participated, and the new ones got to learn something about me.
After the game we played “pasa la bola,” and students had to answer, using full sentences, when asked ¿Cómo estas? and also ¿Cómo te llamas?
They needed a little bit of movement, we reviewed colors and the shared about their favorite color before playing the “color, colorcito ” game.
(image taken from the Boston Children’s museum website)
It was time to settle down and talk about the rules in class. Toward the end of last school year, I started using “Whole Brain Teaching“in my class. I had great results, so I decided to implement it from the outset of this school year.
We went over the first 5 classroom rules and practiced them a lot!
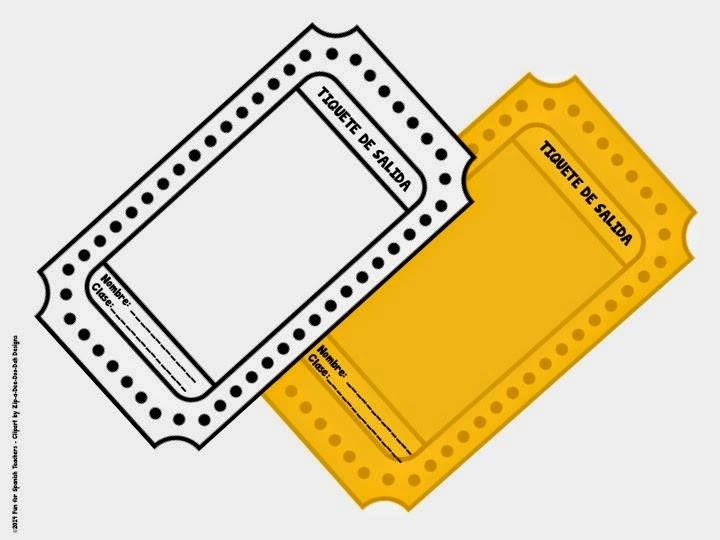
At the end of class, I used an oral “exit ticket” about the rules and then they went to line up to go back to their classrooms.
It was a simple lesson, but it seemed to be a good fit to start the new school year. If you were wondering if this all happened in Spanish, yes, it did! Modeling a lot, using TPR, and tons of visuals help! It was a 45 minute period too!
I am one of those Spanish teachers that loves singing in class for many reasons. Through songs, students learn new vocabulary, internalize grammar structures that may be useful in the future, and explore vocabulary in context – and singing along to a tune is a great way for them to practice pronunciation.
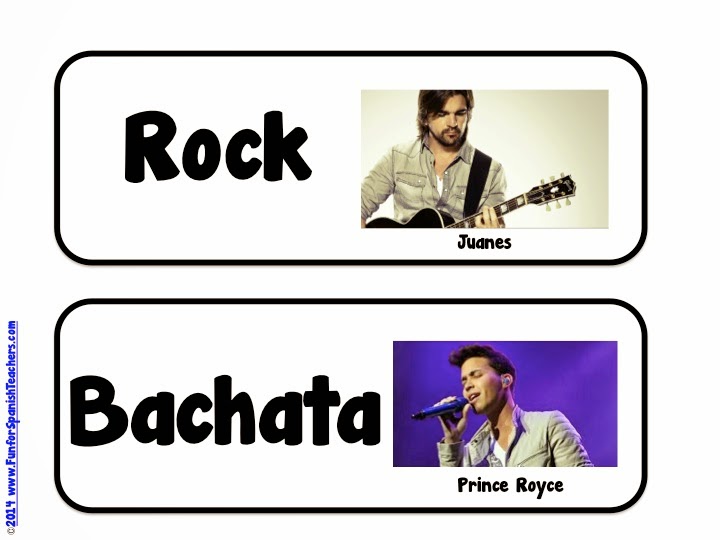
I teach at the elementary level and of course some songs may be complicated for my students. However I ensure there is a natural progression, where I first introduce some basic rhythms, and later, with greater familiarity of beats and timing, we use the rhythms in the various songs we learn in class. We sing the songs while adding some features of the rhythms and some basic dance steps, which adds some movement to the singing and gets everyone moving in class to break the ice and get circulation moving! I also have a set of flash cards with some famous singers that I show while doing the activity. You can download the cards for this activity HERE.
This is how I use the cards:
Rock: Pretend you are playing an electric guitar while singing. Bachata: Use a soft voice and pretend to hold a microphone. Salsa: Sing faster and use the basic Salsa step. Merengue: Use the Merengue step and sing fast. Ranchera: Use a deep voice and pretend to hold a sombrero while singing. Vallenato: Pretend that you are playing an accordion, which is the main instrument in Vallenato.
I have put together a list of songs that go along with the pictures. This might help your students identify the rhythms with the singers. This is also a fun way to bring some culture (and pop culture) into your classes. Feel free to add more traditional rhythms to your list. ¡A cantar y bailar!
Are we supposed to return those 3-D glasses after we watch a movie? I’m not sure about that, but I am sure that your students will have so much fun with them! I have a couple of pairs that I’ve kept and use with my students to play a simple and silly game they all love.
I’ve created small flash cards that I stick to the glasses using velcro. I ask for a volunteer to wear the glasses and guess the name of the flash card that I’ve placed on top. There are different cards related to the units we’re exploring. This game never gets old!
Once the volunteer is wearing the glasses, the class asks the questions in unison. The student with the glasses gets three turns to guess. Depending on their level, I might ask them to make sentences using each specific word.
I also use this game as an opportunity to explain the differences between ¿qué es? and ¿qué son? vs ¿quién es? and ¿quienes son? My students are very young, so I choose not to have discussions specifically about grammar in my classes, but they understand it through songs and games like this one. Naturally 🙂
There is a freebie here for you! Just click HERE to download the cards.
I teach PreK-3 Spanish in a FLES program. I don’t have a classroom, which means I am always on the run. Sometimes I consider myself lucky not to have a classroom – like a traveler who can live simply with whatever she can carry instead of building up “stuff” or having to take care of a “home base.” It’s also really nice to get to know what’s happening in all the different teachers’ classrooms so I can coordinate my curriculum and tailor or tweak my lessons to support some of the units my students are exploring with their homeroom teachers, and to match each classroom’s distinctive look, feel, and personality. However, the downside to being an itinerant viajera (traveler) is that my school is laid out as a campus, with several small buildings scattered about, and when the weather gets bad, I suffer from all the things I have to carry with me (though I save money on gym memberships, but that’s another story…). I have been teaching for 15 years and have found that every year I have been developing strategies to make my job easier when moving from classroom to classroom. In this post, I’ll share what I’ve been doing, hoping this can help you too 🙂
TOTE BAGS ARE GREAT!I use rigid canvas tote bags because they remain open, making it easier for me to reach my materials at a moment’s notice when teaching. Since I teach from Pre-K through 3rd grade, I use three bags: One for Pre-K and K
One for First and Second grade One for Third Grade
LET’S TAKE A LOOK INSIDE ONE OF MY BAGS
They might look heavy, but really they are not! I’m careful to pay attention to the weight I put in my bag, again like a backpacking traveler! Many of the objects I have are made of fabrics or paper – more bulk than weight.
USEFUL PROPS TO CARRY IN YOUR BAG
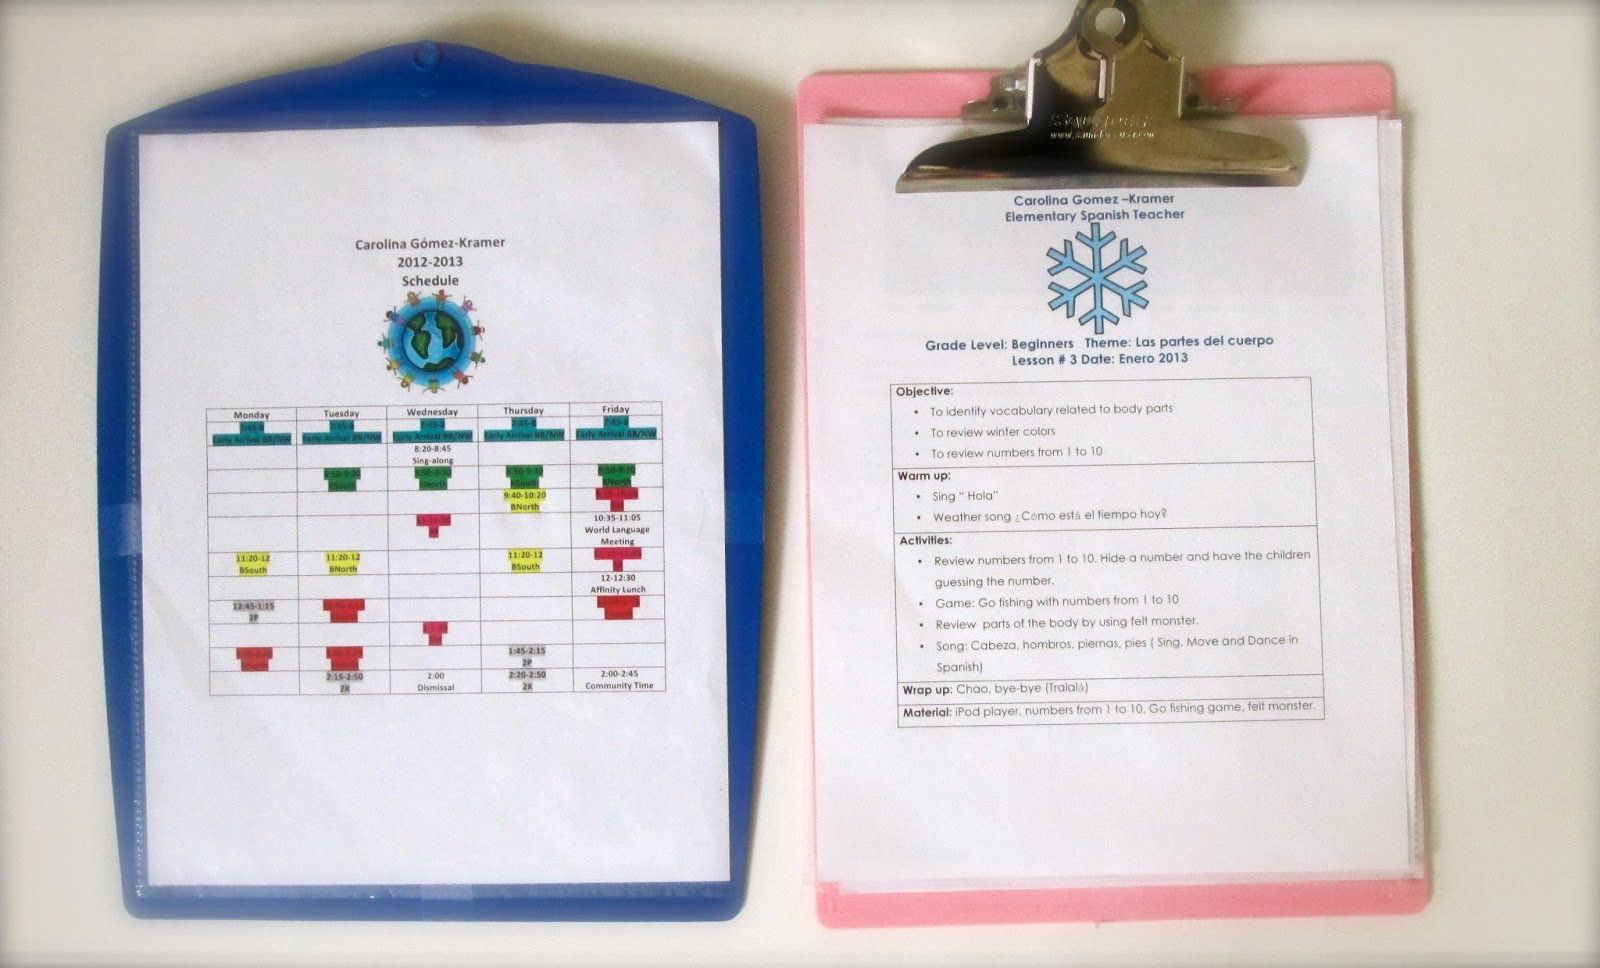
1. Clipboards: I use clipboards to carry my lesson plan for the day and my schedule.
2. Chime: I have a chime in my bag just in case my chants don’t work to call the
students to attention!
3. Balls: I use them in games to give turns to children. There is also a game called “Pasa la Bola” that my students love to play. You can find more info about this gamehere.
4. Hangers: I use them to carry a calendar and posters.
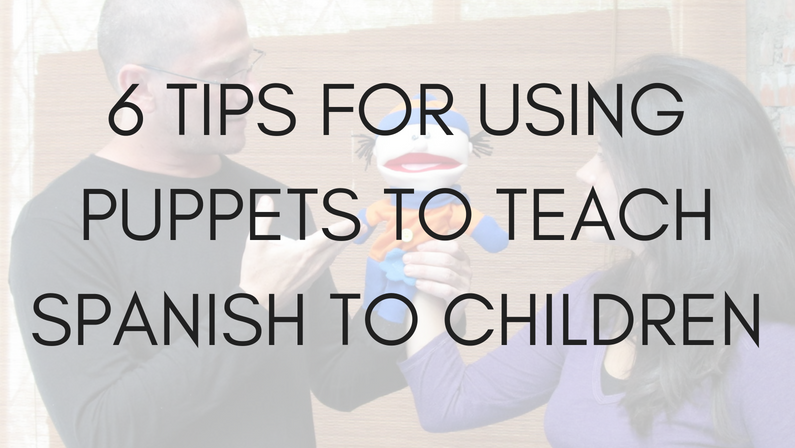
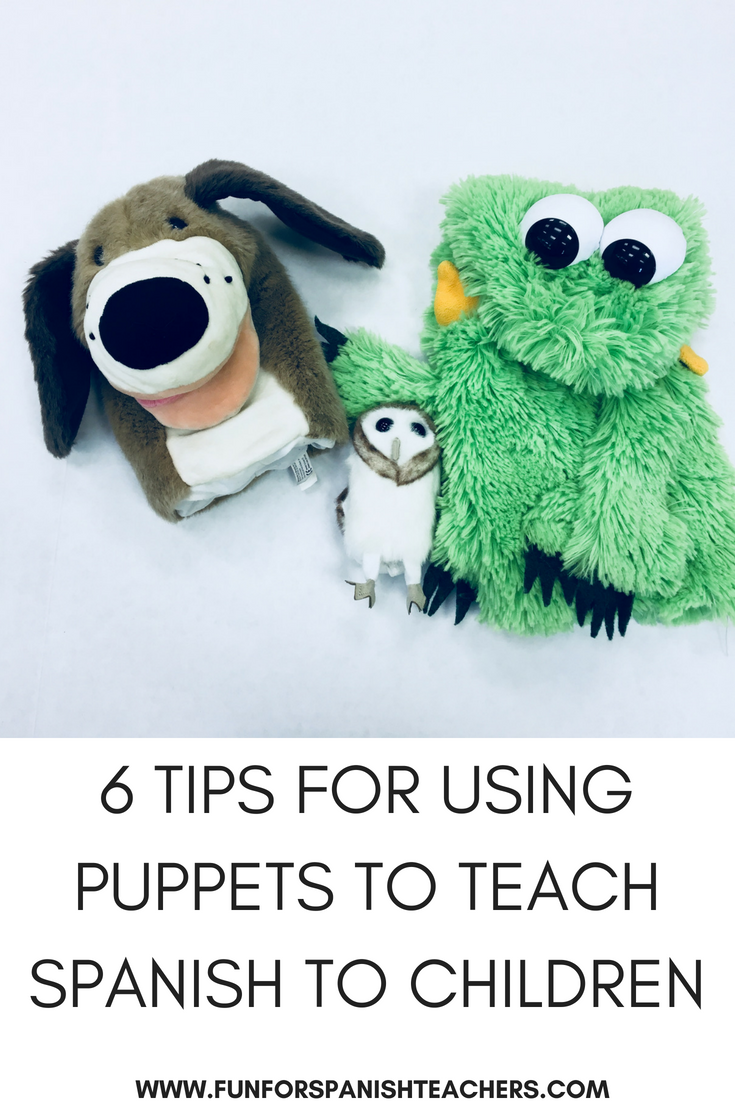
4. Puppets: My younger students always love when I invite puppet friends to class to sing songs or play games. Here is a post that will give you more tips to use puppets in class.
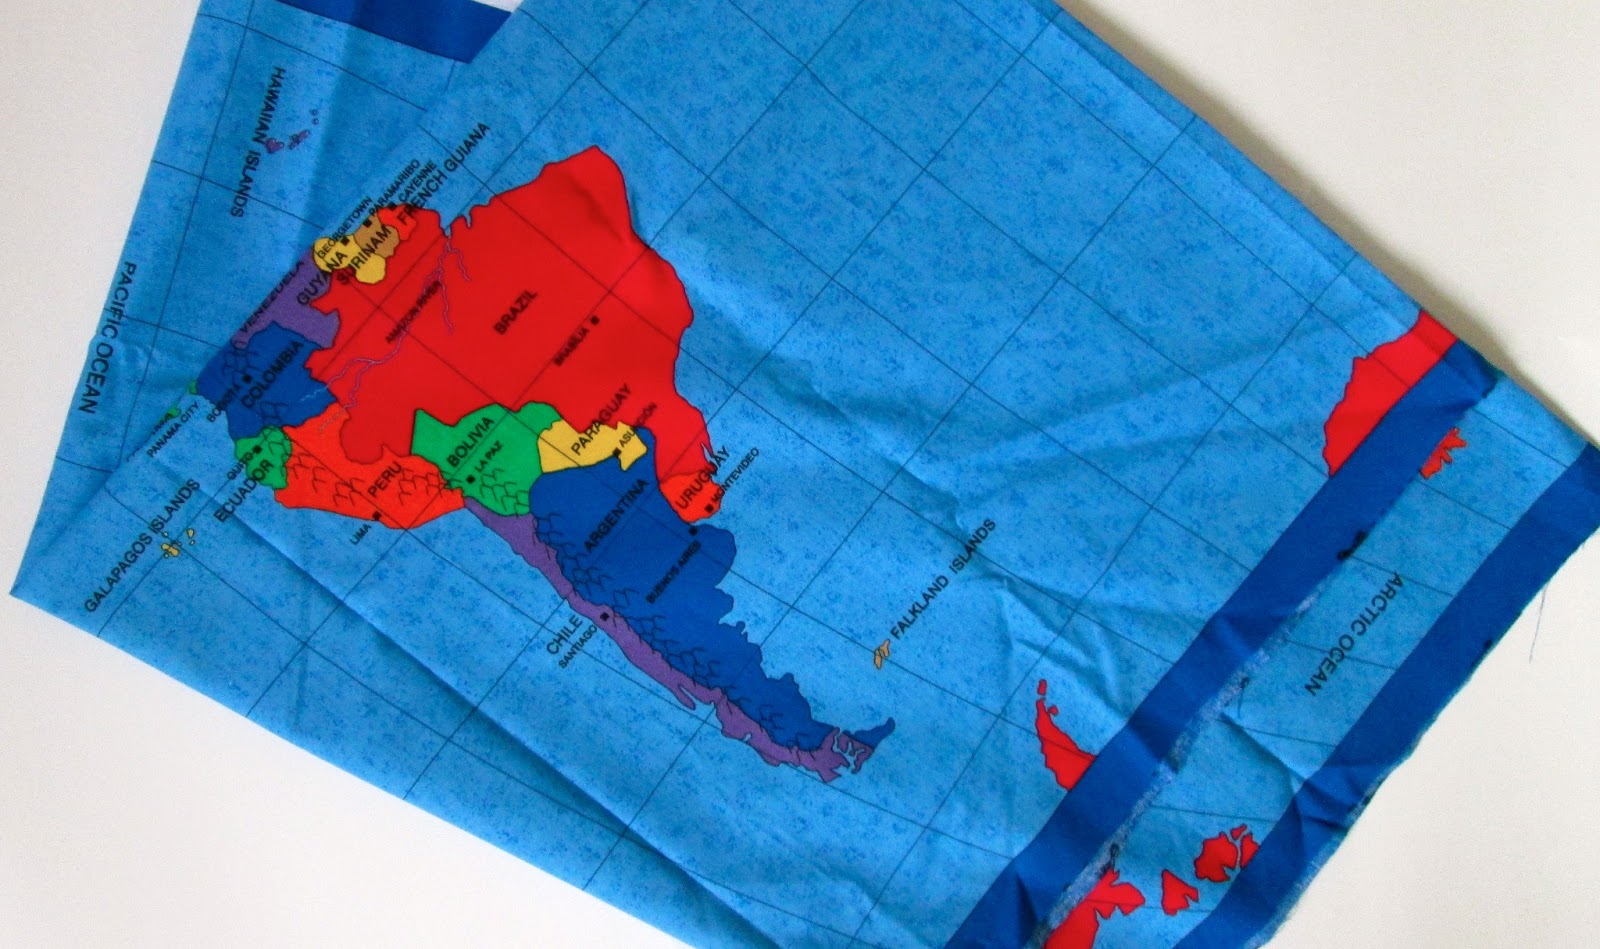
5. A map: I found one at a fabric store, and I love it! It has every single continent, and I just fold it and put it in my bag. I am still trying to find one in Spanish!
6. Gloves: I use gloves for storytelling with my younger students. I love making props out of fabric and just add velcro on the back. Students love stories and poems with props!
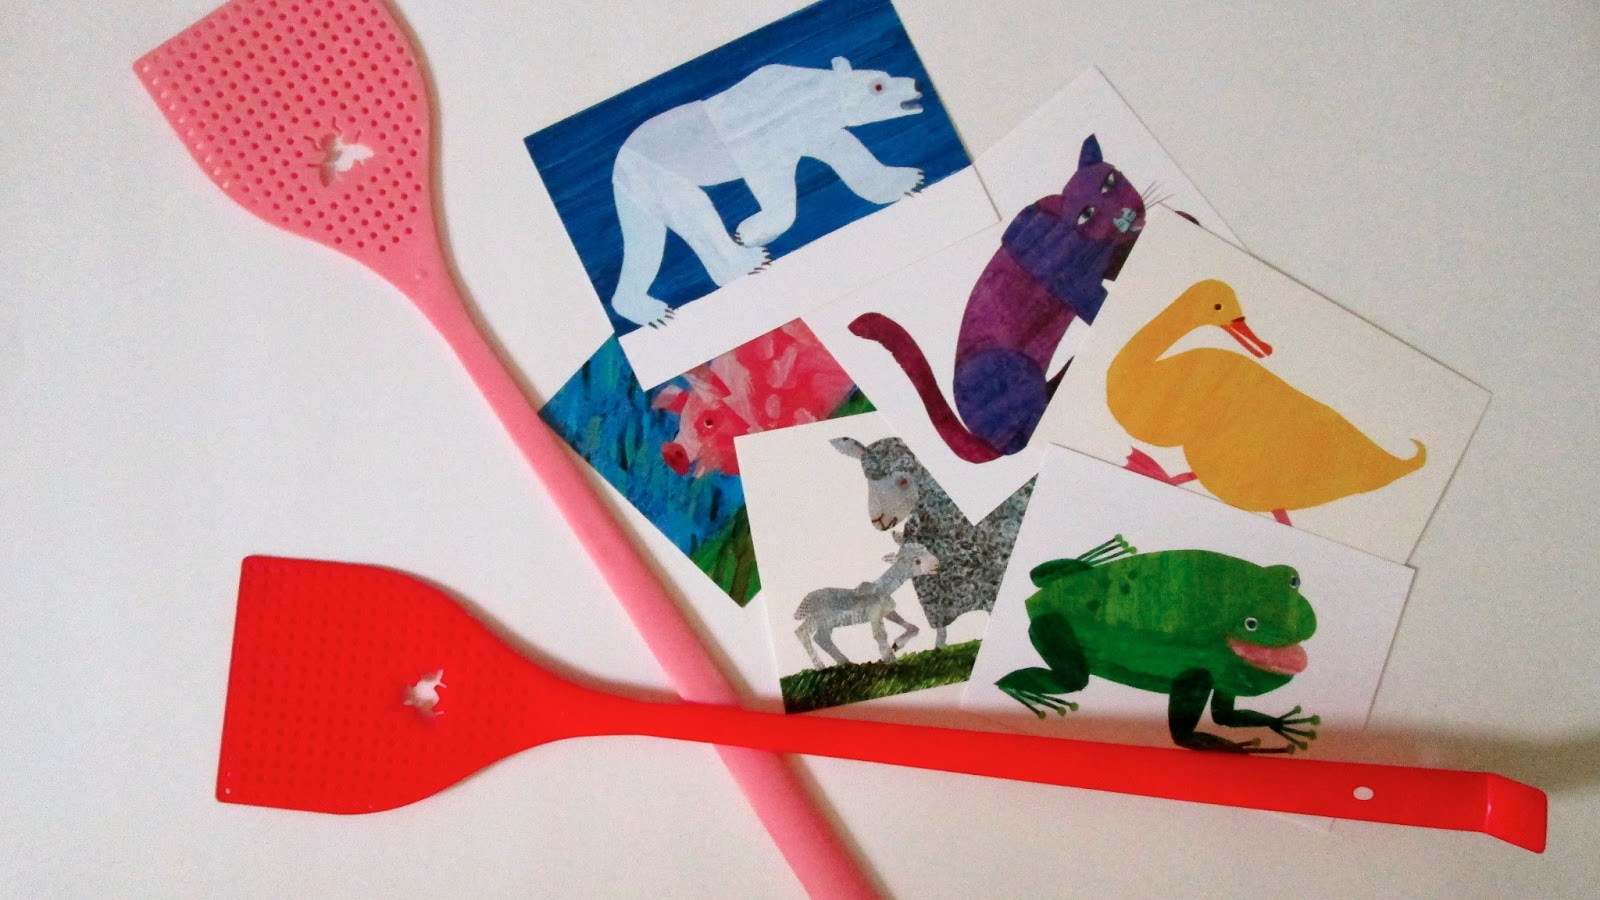
7. Flash cards and fly swatters: Flash cards are always easy to carry and are helpful when introducing vocabulary. Here is a postthat will help you with different games to play with flashcards and fly swatters.
8. Cookie tray: I use cookie trays with small pictures and magnets on the back. I also use them to place work that I collect from my students.
9. Music: An iPod or CD players are always helpful. Believe or not, not every teacher has a device to play music in their classrooms, so it helps to have my own. Plus, I can pre-load playlists according to my lesson plans and class adventures.
10. Last, but not least! This one is not heavy and belongs inside your heart! Creativity and passion for what you do!
I am really happy to welcome all the new teachers! Thank you for spreading the love of learning a new language in your school community and to your students!
Planning is one of the most important aspects to ensuring a successful class over the course of a school year. Of course, getting to know your school community and the needs of your students are intimately tied to this part of the teaching process. You also need to be clear regarding what kind of language program your school wants to develop or has in place so that you tailor it to the demand and expectations appropriately. In many cases, we language teachers are in charge of planning our class 100% while building a curriculum from scratch, especially since textbooks at the elementary level have limited applicability for a natural approach to language teaching and learning.
In over fifteen years of teaching languages to children, I have found that planning a week in advance for the following week works perfectly and gives me time to assess the material, reflect on the way I am teaching, and to adapt for my students as needed. Although there are fancy higher tech ways to do this, I’m old school when it comes to planning, choosing to keep it simple. I plan for every day on a single sheet of paper, and by the end of the school year, I have about two big binders with all my lesson plans collected in one place. I re-use this lesson plans the following year, but I create a new binder with changes as I adapt activities year by year.
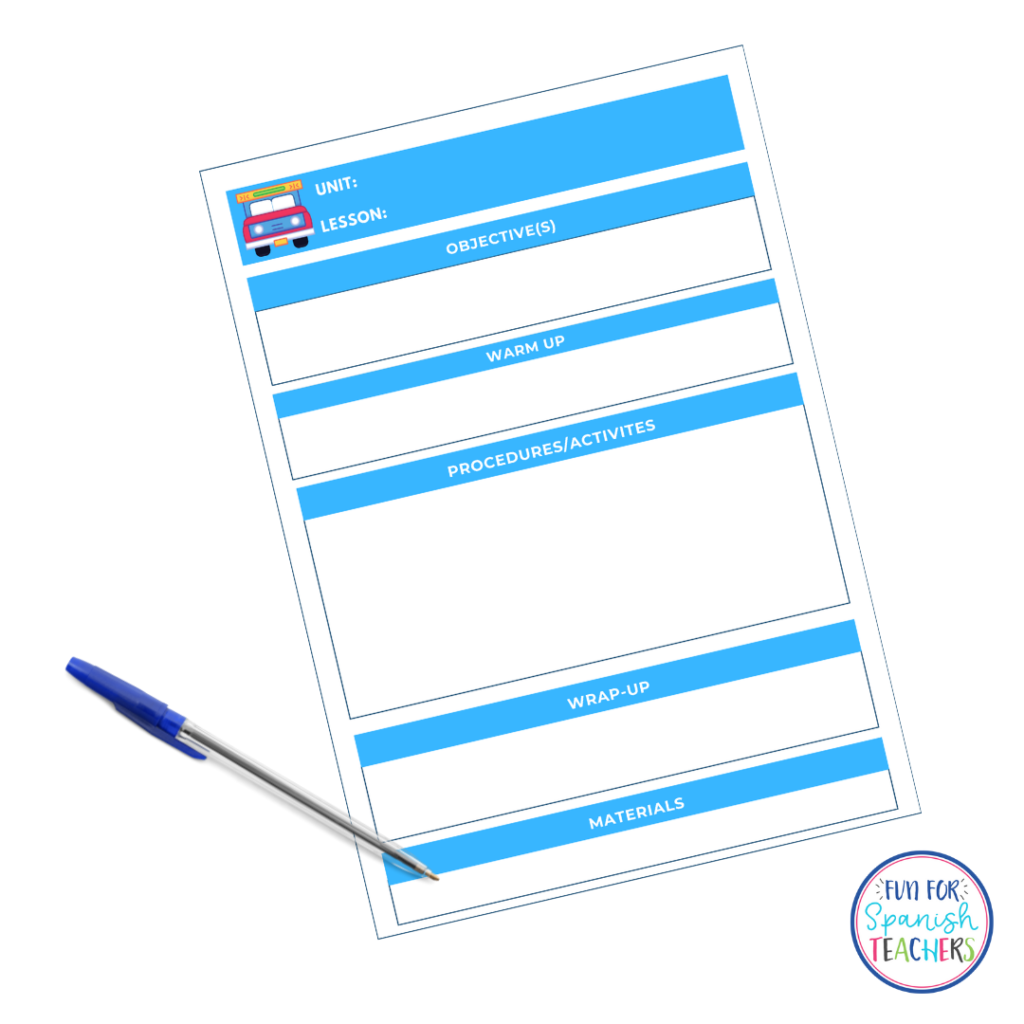
How to write a lesson plan for a 20-30 minute lesson
Prepare a routine: Make sure you develop a clear routine for your class. A routine doesn’t equate to boredom and doesn’t mean that the activities are always presented in the same way. Creating a routine means creating a space for learners to feel safe about their knowledge and to be ready to switch gears. Prepare two to three elements that are always in your routine, but make sure they can be presented with plenty of variation.
Objective:
This objective is one objective or piece of an objective drawn from the objectives planned for the entire unit. Remember that a spiral curriculum plan will allow you to come back to your other objectives later. This singular focus helps ensure that your entire lesson is well-targeted and clear. It’s the foundation for all that you do with your students.
Warm-up:
Includes your routine (calendar, weather, birthdays, etc). Singing or playing a game related to the routine or theme of study helps students warm-up for your lesson and creates a positive environment.
Activity/Procedures
The activity is the core of your lesson. In this stage of the planning, students will get engage with your theme for the unit. Different strategies are stated here to allow students to accomplish the lesson’s objective. It is important to determine the steps of the activities and to be clear about them to create a confident learning environment. An unclear set of activities will create confusion between students.
Wrap-up:
This allows you and students to know clearly when a class is over and feel a sense of accomplishment. This ending can be done through a simple game or by reviewing some elements that were explored in the lesson.
Evaluation/Assessment:
In a FLES class, the assessment is mainly done during the progress of the lesson. Try to focus on a few students per lesson, and observe them closely during the development of the lesson.
Materials:
List all kinds of resources you will need to teach your lesson effectively. This will also help you to prepare in advance and avoid trips to your office during class.
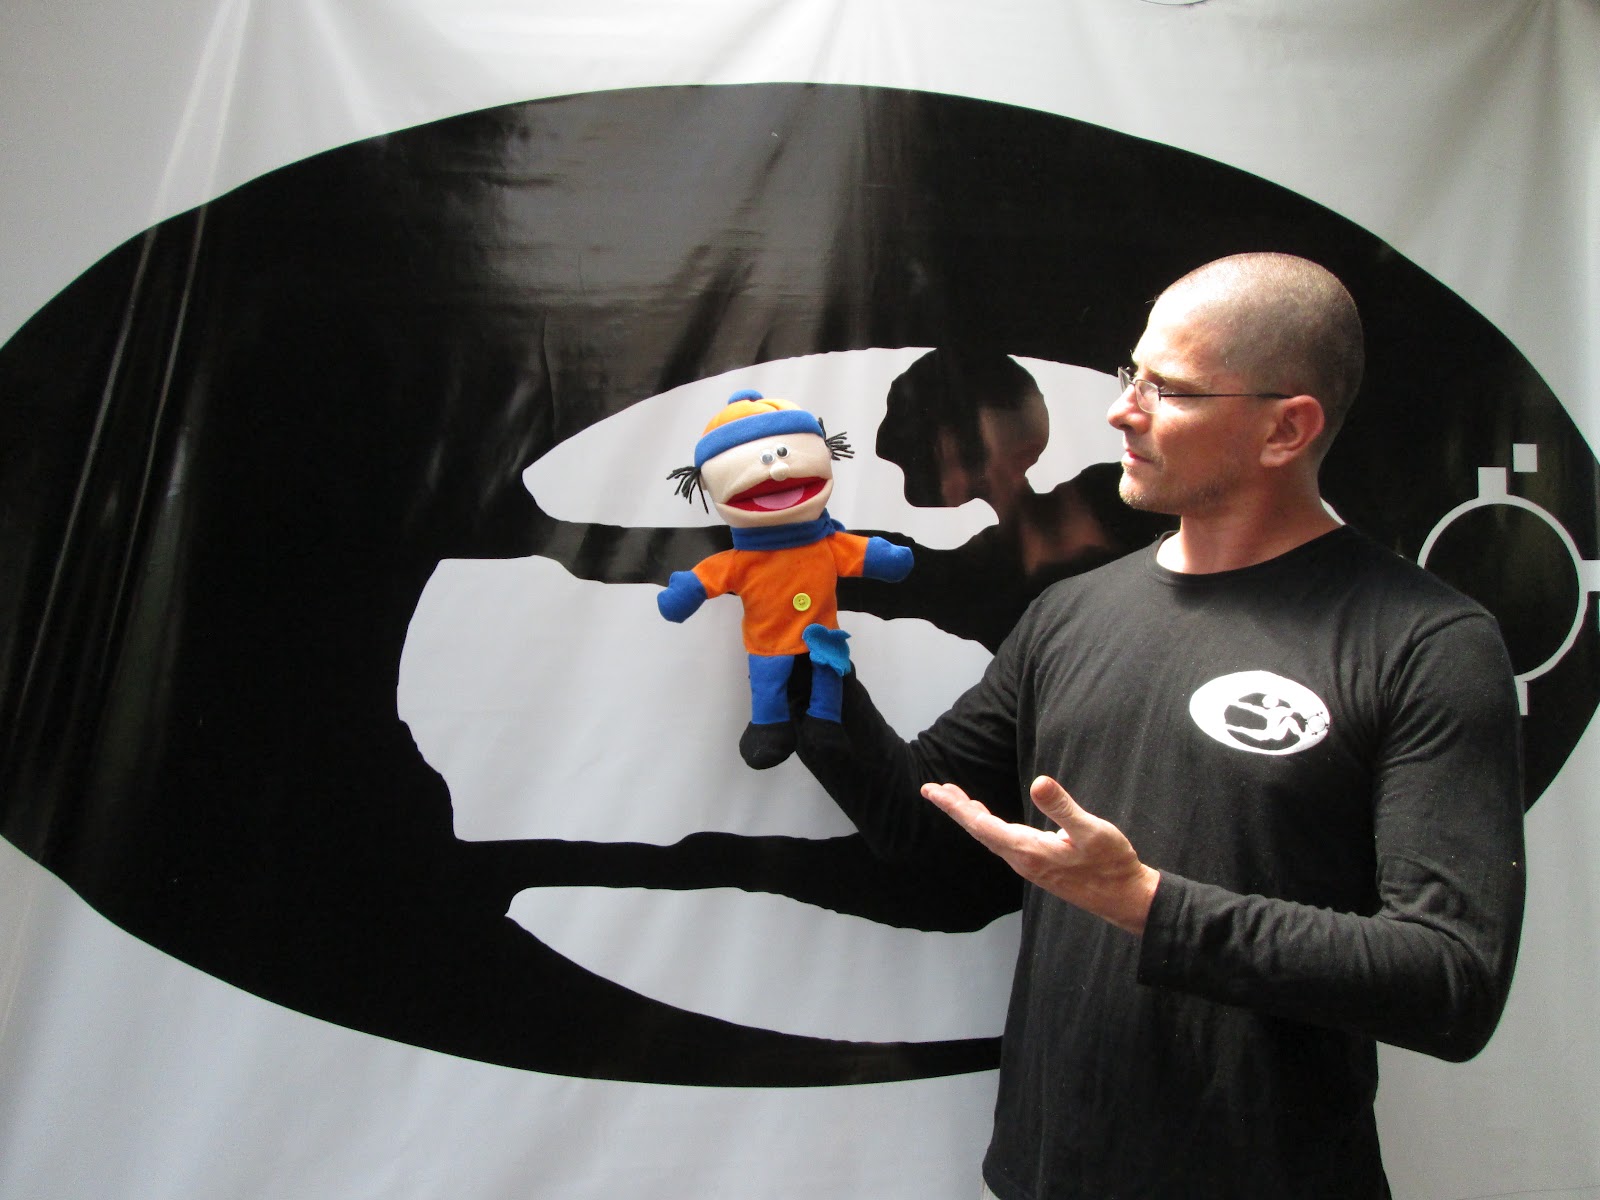
I have been extremely lucky this summer during my trip to Colombia to have had the opportunity to find amazing people who can continue contributing to my professional development and to become better at what I do, teaching language to children. This time I had the opportunity to learn from Jaime Andres Castaño of Corpoteatro. Corpoteatro is a small organization that provides workshops for teachers to learn more about how to incorporate theatrical techniques into their teaching. It also offers workshops for children and anyone who is interested in learning how to use theatrical techniques in their daily life. Reminds me a bit of all the ads I’ve seen on the subway (T) cars in Boston for Improv Asylum and their ads that say “No More Group Hugs with Brad From Accounting,” targeting corporate team building, as well as all the amazing ways theater is used in social cause grassroots organizations. Theater is essential – it really enriches the theater of our lives and is fantastic for teaching people of all ages.
One form of theatrical art involves puppets. With my visit to Corpoteatro, I wanted to learn more about basic techniques to use with simple puppets. With their help, I learned that mouth puppets work great because they are very simple to handle and give me one free hand to point at other materials. I have always loved puppets and use them frequently into my teaching (I am a PreK to 3rd grade Spanish teacher in a FLES program) because puppets give me excuses to create silly and joyful situations that open the children to learning and make a dynamic conversational environment based on play and make-believe. Puppets are a great teaching tool that allow children to forget they are listening to a language they are just learning and gives space for a playful and natural-feeling environment. In many cases, my puppet friends show up in class to teach something new, or to ask my students about something we recently learned. Their appearances in my classes are usually very short, which makes my students ask for their puppet friend in the next class. Each of my puppet friends has a name, and I usually use a name that is tied to a cultural connection or refers to a word in Spanish. For example, I have a puppet girl that I have named Cumbia (traditional Colombian dance) and another one I named Rana (frog).
Tips to Keep in Mind!
Andres gracefully shared his basic tips that can help educators when using puppets in their classes.
1. Treat your puppet like any other class member. Give it a name, a voice, and a space in your class. This puppet cannot be used by your students. They need to show respect to the puppet too!
2. Make sure you always use the same voice for this puppet, and don’t confuse it with any other puppet. Limit yourself to one or two characters for the school year. This will make the children feel confidence and know that it creates a safe environment for everyone.
3. Use syllables when your puppet talks. You want this puppet to look very natural.
4. Always look at your puppet when he or she talks.
5. Make sure to greet your puppet when he joins the class and also say adiós when he leaves the class. Put it away very carefully. Have a box or bag where you always place it.
6. Most importantly as with all teaching, smile and have fun!
I do have to admit that at the beginning it is not comfortable when using puppets, but once you see your students’ faces, you will see how rewarding it is to have puppet guests in class!
¡Hola! I am Carolina, a Colombian elementary Spanish teacher based in Boston, MA. Fun for Spanish Teachers is the result of my passion for teaching Spanish to children and my desire to inspire collaboration and creativity in a vibrant teaching and learning community. It’s the perfect stop if you are looking for songs, games, teaching tips, stories, and fun for your classes.
To provide the best experiences, we use technologies like cookies to store and/or access device information. Consenting to these technologies will allow us to process data such as browsing behavior or unique IDs on this site. Not consenting or withdrawing consent, may adversely affect certain features and functions.
Functional
Always active
The technical storage or access is strictly necessary for the legitimate purpose of enabling the use of a specific service explicitly requested by the subscriber or user, or for the sole purpose of carrying out the transmission of a communication over an electronic communications network.
Preferences
The technical storage or access is necessary for the legitimate purpose of storing preferences that are not requested by the subscriber or user.
Statistics
The technical storage or access that is used exclusively for statistical purposes.The technical storage or access that is used exclusively for anonymous statistical purposes. Without a subpoena, voluntary compliance on the part of your Internet Service Provider, or additional records from a third party, information stored or retrieved for this purpose alone cannot usually be used to identify you.
Marketing
The technical storage or access is required to create user profiles to send advertising, or to track the user on a website or across several websites for similar marketing purposes.