Let me start with my own story! ONCE UPON A TIME… I used to be a teacher who relied heavily on vocabulary lists and checklists of what my students needed to memorize. For example, my third graders were required to name five fruits, five animals, school supplies, and places in the community, among other things. All these vocabulary words were disconnected and lacked context. I also expected my students to remember these words indefinitely and use them the following year. This often left me feeling frustrated, and I blamed my students for not retaining words they had only heard during the fruit unit.
Everything changed when I started teaching with stories. I began to focus on high-frequency and useful phrases and language. Instead of just concentrating on the five-word fruit unit, I told stories where students not only learned the names of the fruits but also how to express likes and dislikes while following a plot in the target language. These stories were simple, engaging, and provided the necessary repetition for my students to acquire the language, not just learn it.
As a teacher, I felt my teaching toolkit was rejuvenated. I discovered different ways to bring stories to life for my students—through pictures, short clips, picture books, co-creating stories, songs, or short stories I created for them. I didn’t switch to teaching with stories overnight. I started gradually, and with practice, I became more confident in integrating more stories into the various grades I teach. Now, I can proudly say that my curriculum is 90% story-based.
I remember that the first story I told my students was the picture book Froggy Gets Dressed (Froggy se viste). I first read the story and then retold it using props. The story was so repetitive that by the end, they were repeating it with me. From there, I started incorporating more and more stories, and now I have a full repertoire.
The best part of teaching with stories is that it gives you the flexibility and creativity to make language acquisition an enjoyable process for your students. Your students are more likely to acquire the language when they experience it in context, which makes all the difference. Bringing stories to your students can also broaden their horizons and allow them to learn about themselves and others because through stories, you can also bring culture and teach life lessons. Stories naturally incorporate varied vocabulary and grammar, providing a meaningful context for language use.
Are you ready to start using stories in your classroom? Remember to start little by little, ensure that you feel connected to the story, and practice before bringing it to class! And remember, it doesn’t have to be perfect; with practice, you’ll become more confident and proficient at telling stories!
A short story can be used in more than one class! There are many activities you can engage in after telling or reading a short story. Here are ideas some that will help you maximize short stories:
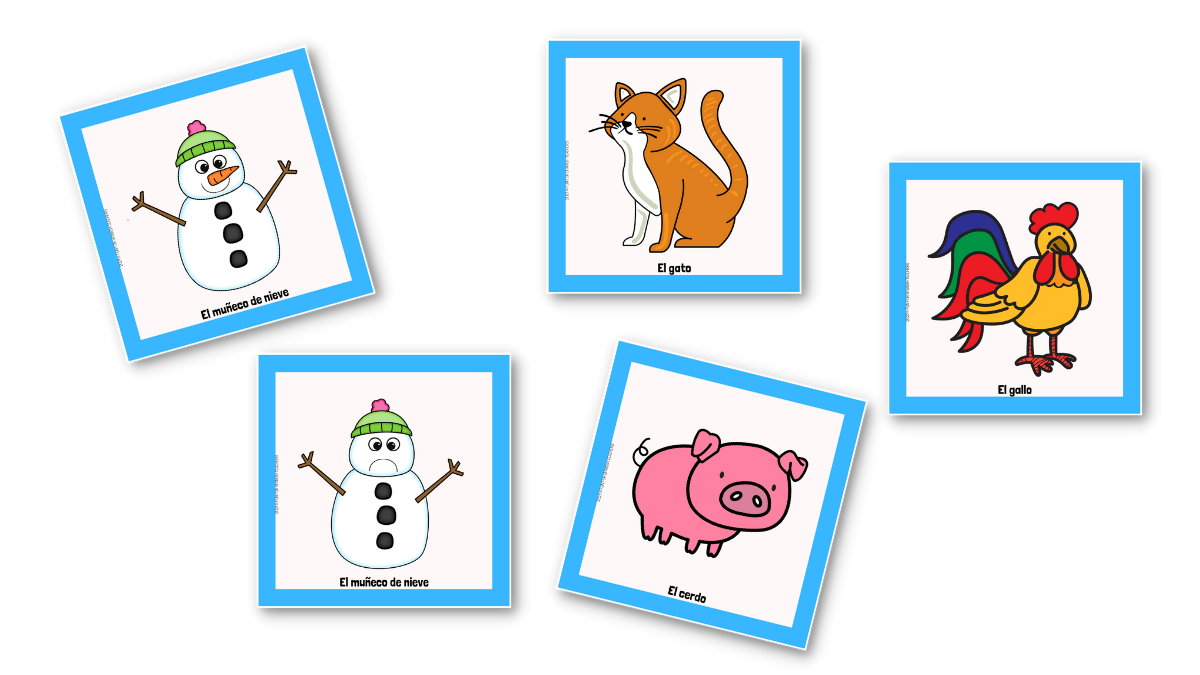
Start by Introducing the Characters of the Story: If possible, print the characters and discuss details such as sizes, colors, ages, and so on. Create gestures for each character and use TPR to introduce them if the characters are animals.
Tell the Story: There are various ways to narrate a story. You can draw the story, use props, or read it aloud.
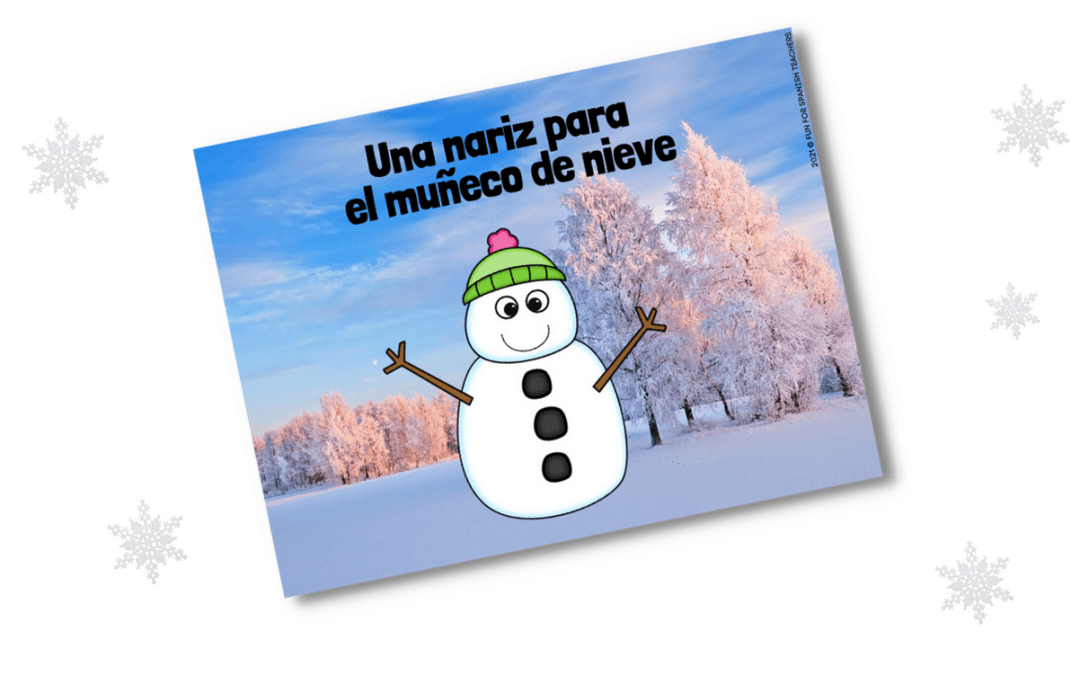
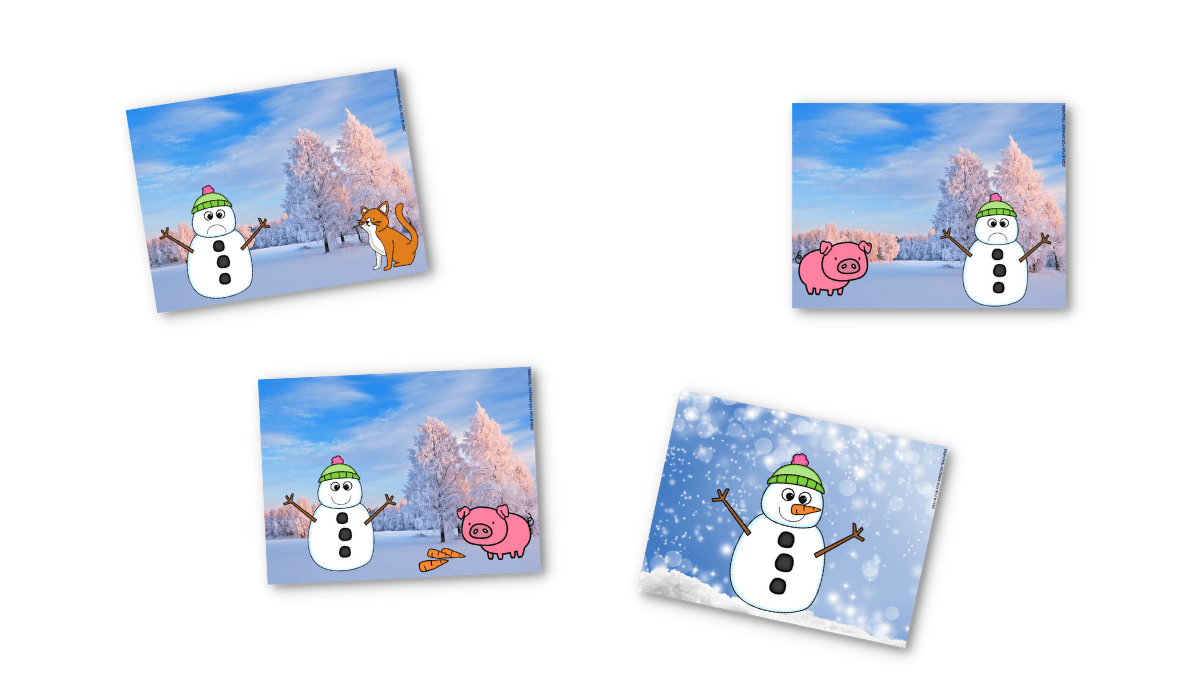
Retell the Story: Utilize pictures from the story to recount it, and pose questions about it. Depending on your students’ proficiency levels, you can ask yes-or-no questions like “¿Hay un cerdo? ¿Sí o no?”, make statements where students complete your sentences, such as “El muñeco de nieve está ______.” or ask open-ended questions like “¿Por qué está triste el muñeco de nieve?”
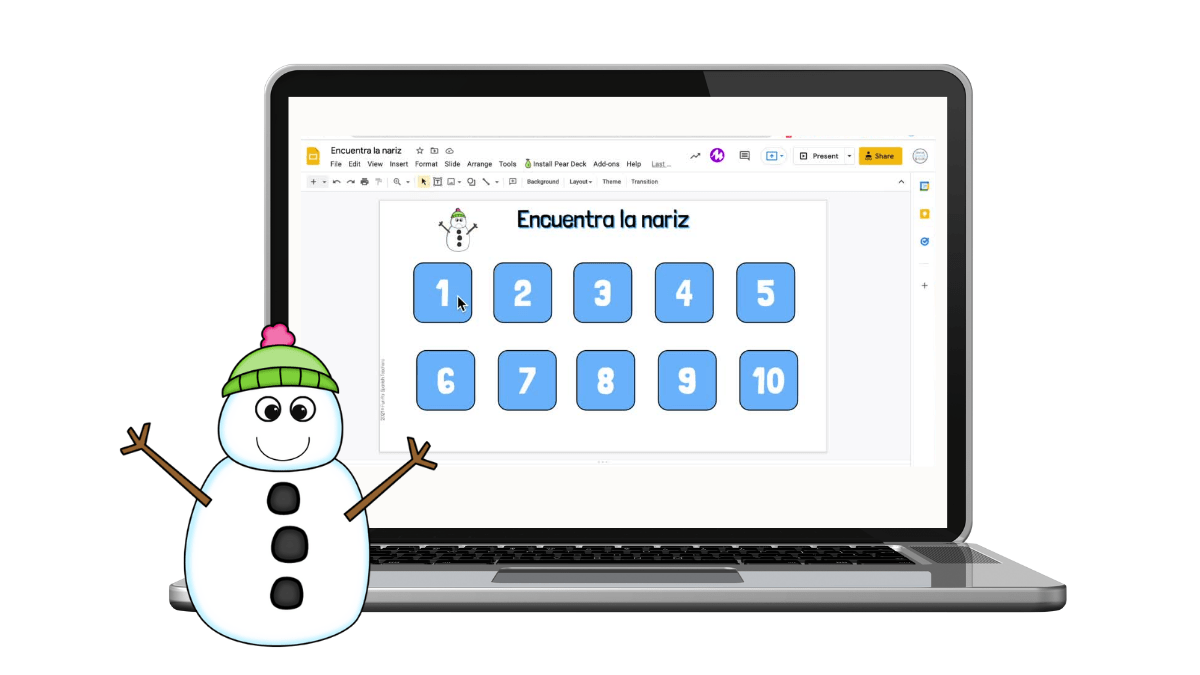
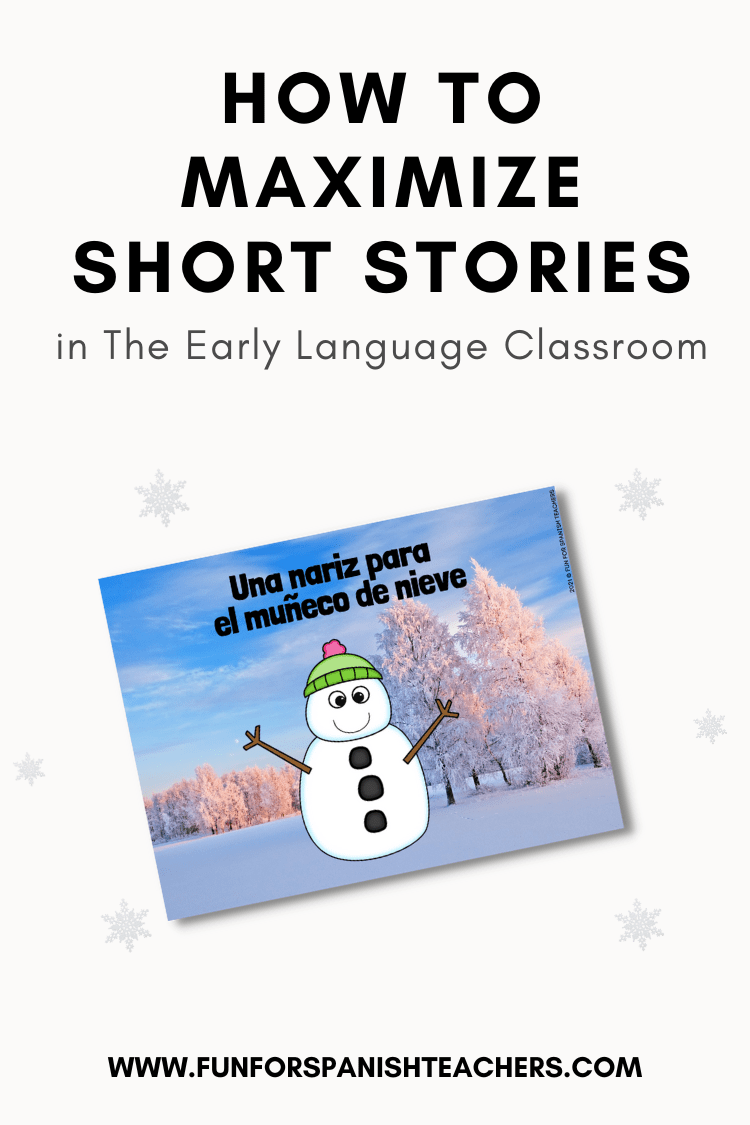
Play Games That Connect to The Story: Incorporate guessing games, memory games, and more! For instance, in the case of this story, students can find under which number there is a nose for “el muñeco de nieve.”
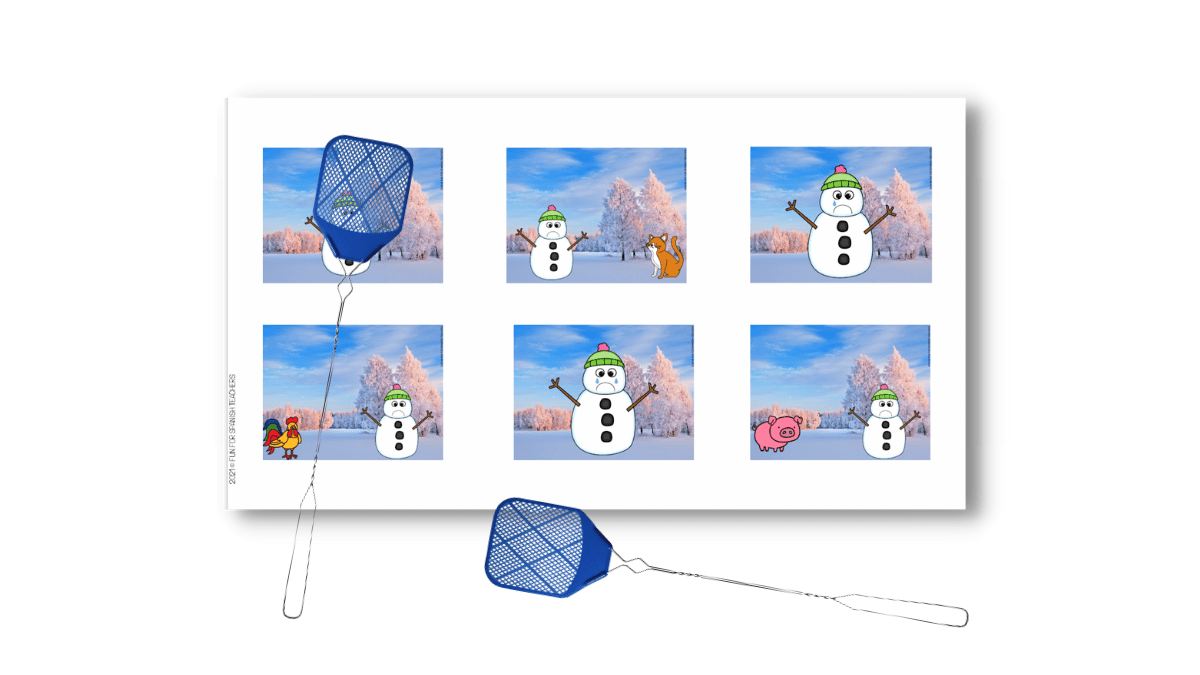
And Don’t Forget to Play Matamoscas: “Matamoscas,” or “flyswatter” in English, is an easy game to play. Divide the class into two teams and give each team a flyswatter. Display words or pictures related to the story on a board. Speak a word or describe a picture in Spanish, and players must quickly find and hit it with their flyswatter.
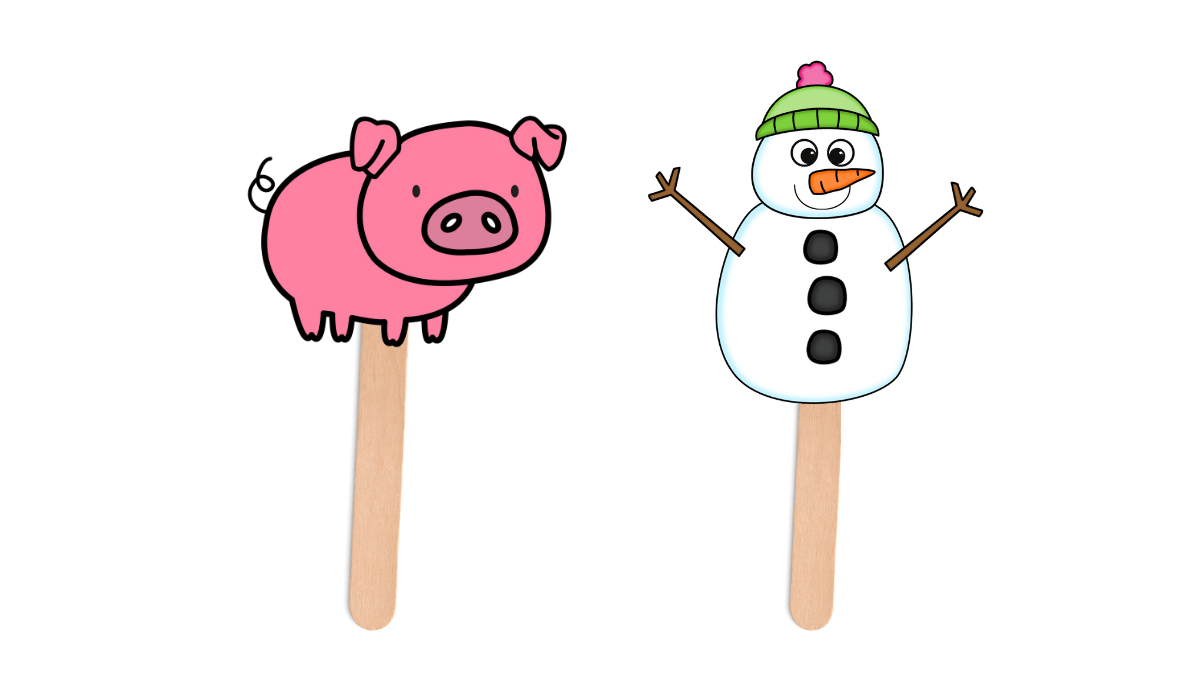
Act it Out: Print out props and take turns allowing your students to act out the story. This is a fun and engaging way to provide repetition. With elementary students, it works best if the teacher narrates the story.
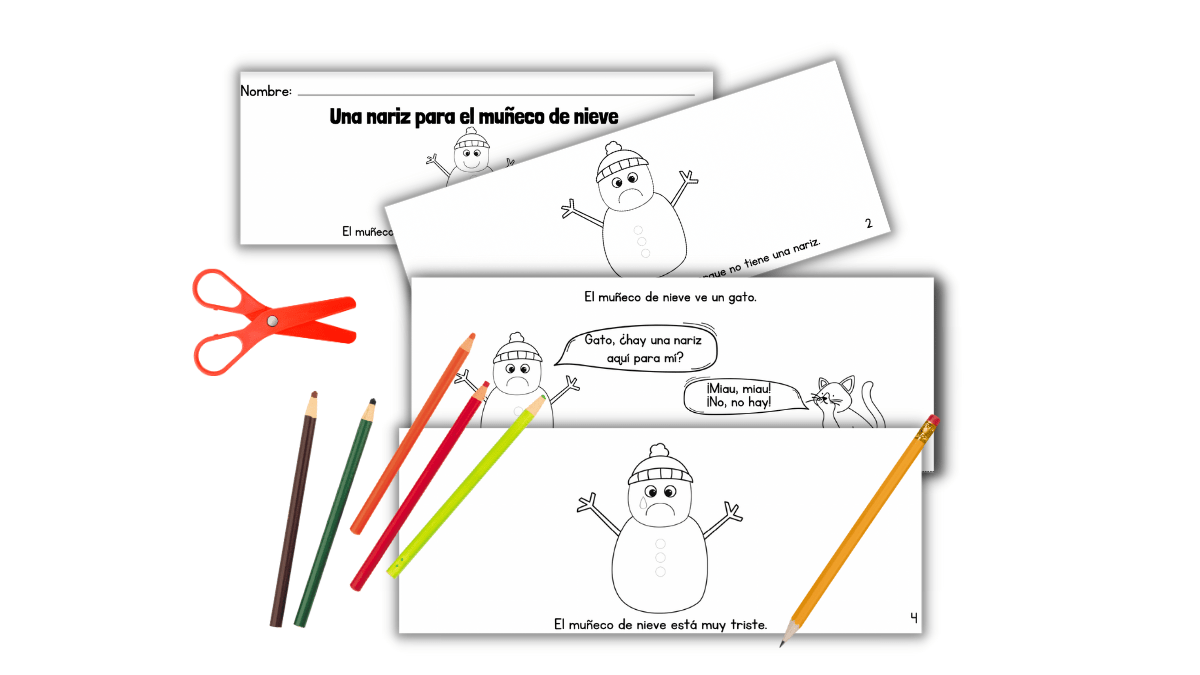
Use Mini-Books: Have your students color the mini-books and share them with their families and/or caregivers, or simply keep the story to read it.
Storyboards: Storyboards are excellent for helping students understand the main ideas of the story. They not only reinforce vocabulary but also check comprehension.
What other activities would you add or use when incorporating short stories into your classes?
Have you ever wondered why your students seem to struggle with retaining the vocabulary you teach them? Or why they sometimes lack interest and motivation when learning new words in your classes? You’re not alone in this struggle. In the exciting world language teaching, making vocabulary come to life can be both an intriguing and achievable challenge. This webinar was hosted and made possible by Klett World Languages. My colleague and friend, Valentina Correa, and I share some tips that have helped us support our students in their language acquisition journey.
In this webinar, we offer practical tools and creative approaches to make vocabulary an integral and exciting part of the language acquisition process. Effective vocabulary teaching goes beyond the simple memorization of words; it’s about arousing curiosity, presenting content that your students can connect with, and promoting communication while respecting their individual process of acquiring the target language. If you’ve felt frustrated due to your students’ lack of retention and motivation, this webinar will provide you with some tools that will assist you in tackling these challenges.
I invite you to relax and enjoy this webinar, which will help you gain new ideas or refresh past ones!
Enjoy!
Don’t have time to watch it right now? Click on the picture to save it for later!
I am one of those Spanish teachers that loves singing in class for many reasons. Through songs, students learn new vocabulary, internalize grammar structures that may be useful in the future, and explore vocabulary in context – and singing along to a tune is a great way for them to practice pronunciation.
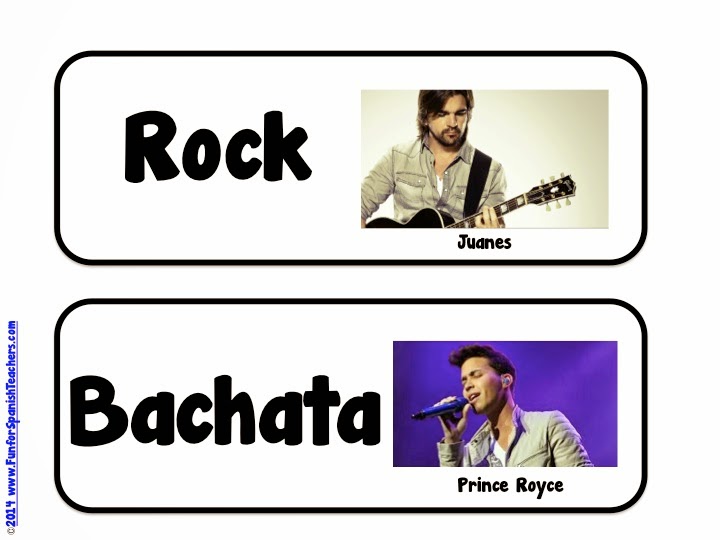
I teach at the elementary level and of course some songs may be complicated for my students. However I ensure there is a natural progression, where I first introduce some basic rhythms, and later, with greater familiarity of beats and timing, we use the rhythms in the various songs we learn in class. We sing the songs while adding some features of the rhythms and some basic dance steps, which adds some movement to the singing and gets everyone moving in class to break the ice and get circulation moving! I also have a set of flash cards with some famous singers that I show while doing the activity. You can download the cards for this activity HERE.
This is how I use the cards:
Rock: Pretend you are playing an electric guitar while singing. Bachata: Use a soft voice and pretend to hold a microphone. Salsa: Sing faster and use the basic Salsa step. Merengue: Use the Merengue step and sing fast. Ranchera: Use a deep voice and pretend to hold a sombrero while singing. Vallenato: Pretend that you are playing an accordion, which is the main instrument in Vallenato.
I have put together a list of songs that go along with the pictures. This might help your students identify the rhythms with the singers. This is also a fun way to bring some culture (and pop culture) into your classes. Feel free to add more traditional rhythms to your list. ¡A cantar y bailar!
The “Exit Ticket” is a technique used by many teachers in different subjects. It’s usually utilized at the end of the class before the students leave your classroom. It is used as a way to check for understanding, to clarify concepts in preparation for the following class, or as a way to assess students. Students may respond to questions about the class, list what they remember, ask the teacher questions, and so on.
I have used this technique in my classes, but have usually just done it orally. I typically line up my students and ask simple questions related to the topic we’ve focused on in class. For example, I might show a flash card and ask a student to name the picture on the card or ask a question about it. The only way a student may leave the classroom is by responding to my question. Taking it a step further beyond oral delivery, using the “Exit Ticket” on a paper allows students to practice their writing skills and can in some cases be a faster and more efficient way to end the activity.
I have included a template of the “Exit Ticket” I plan to use. You can customize it according to your needs.
*Tiquete is used in Colombia and other Spanish-speaking countries. See RAE for reference.
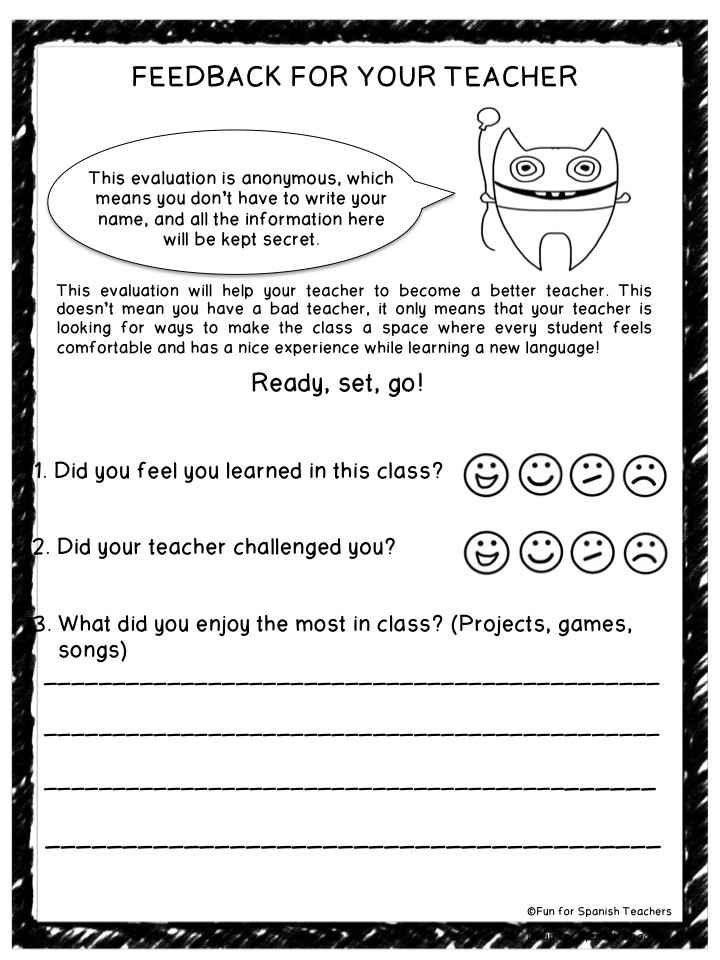
This is something I’ve always wanted to try. I have to say I was scared of it. I think it’s nice to know what my students think about me and my teaching style. I have had other teachers and my school principal observing my classes, but the group that I think knows the best about me as a teacher are my students.
Letting your students give you feedback will allow them have a different relationship with you and your subject matter. You’re empowering them, letting them know how important it is for you to know what they think. It’s really a no-brainer, as they are the ones that have first hand experience with you as their teacher. They can really help you shape your teaching style and let you know about simple things you didn’t realize, simple things like “you never gave me a turn to participate in the memory game” or “you always call girls first.” Things that sound simple, but at the end influence the atmosphere in your class and what your students think of you. Of course, they can also help you feel great when they give positive comments. Encouraging young people to think critically and give constructive feedback is something that I think all teachers can and should focus on. I know I didn’t have enough of it growing up in Colombia …
I teach students in the lower grades (pre-K to 1st), and I have conversations about what they liked in the class, what they’d like to learn in the future, and what they didn’t like in the class. I also teach second and third grades, and with this age group I let them fill out an anonymous feedback form with questions about the class in general and about me as their teacher.
You can grab a free copy of this form by clicking on the link below. Give it a try, put yourself out there, and let your students have a voice and active role in shaping who you are as a teacher. It’ll empower you and give you fuel for brilliance, too!
¡Hola! I am Carolina, a Colombian elementary Spanish teacher based in Boston, MA. Fun for Spanish Teachers is the result of my passion for teaching Spanish to children and my desire to inspire collaboration and creativity in a vibrant teaching and learning community. It’s the perfect stop if you are looking for songs, games, teaching tips, stories, and fun for your classes.
To provide the best experiences, we use technologies like cookies to store and/or access device information. Consenting to these technologies will allow us to process data such as browsing behavior or unique IDs on this site. Not consenting or withdrawing consent, may adversely affect certain features and functions.
Functional
Always active
The technical storage or access is strictly necessary for the legitimate purpose of enabling the use of a specific service explicitly requested by the subscriber or user, or for the sole purpose of carrying out the transmission of a communication over an electronic communications network.
Preferences
The technical storage or access is necessary for the legitimate purpose of storing preferences that are not requested by the subscriber or user.
Statistics
The technical storage or access that is used exclusively for statistical purposes.The technical storage or access that is used exclusively for anonymous statistical purposes. Without a subpoena, voluntary compliance on the part of your Internet Service Provider, or additional records from a third party, information stored or retrieved for this purpose alone cannot usually be used to identify you.
Marketing
The technical storage or access is required to create user profiles to send advertising, or to track the user on a website or across several websites for similar marketing purposes.