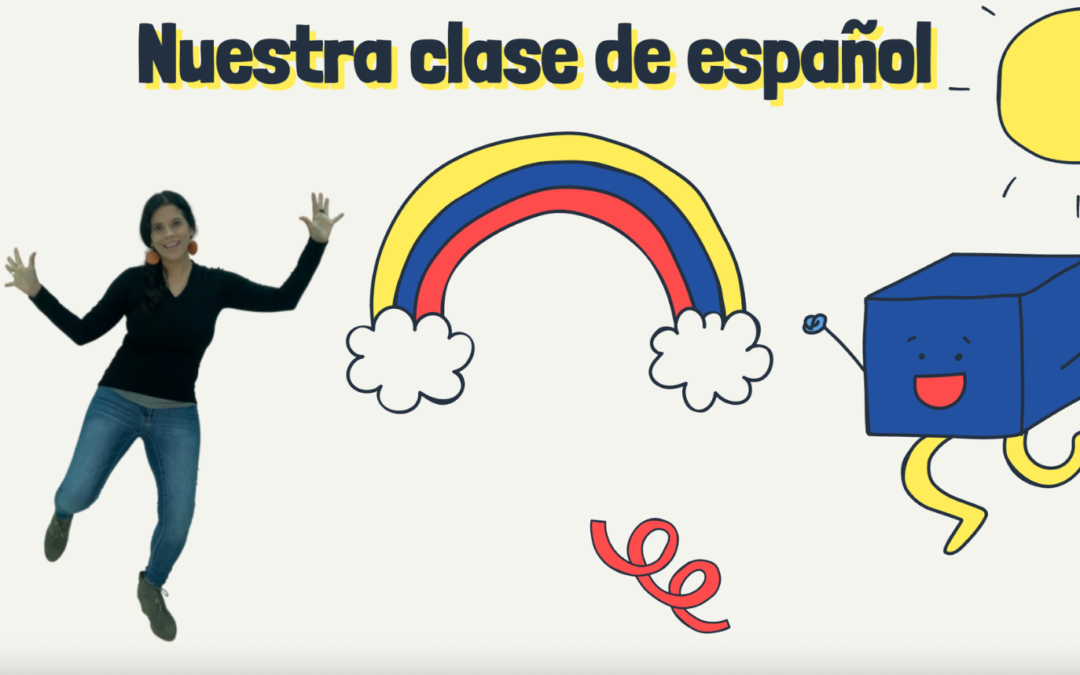
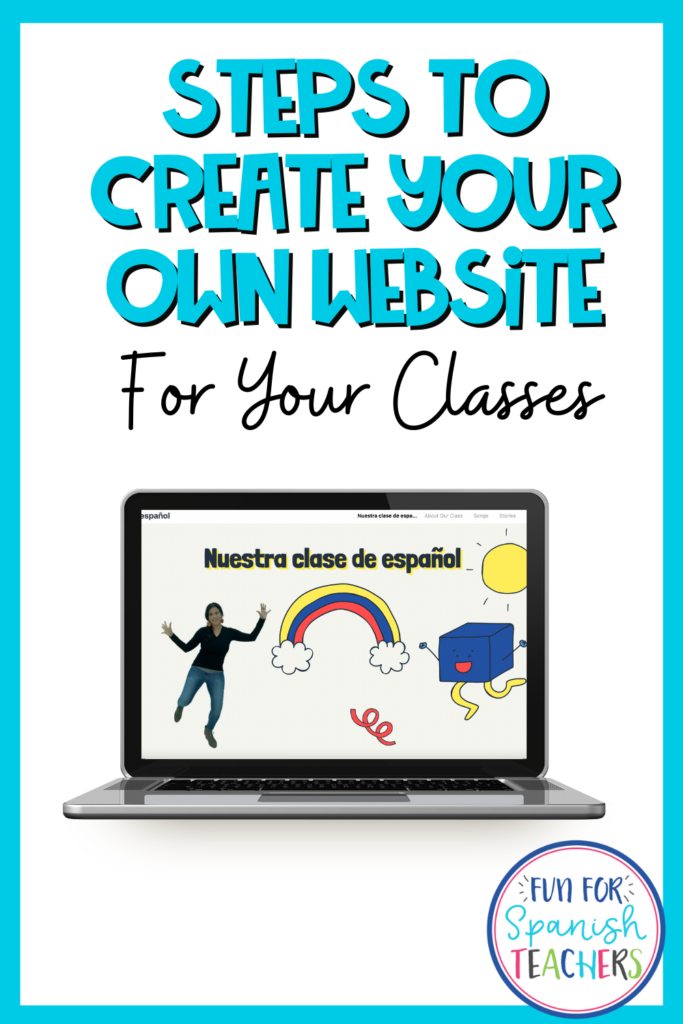
Have you always wanted to have a website for your class? Here is a quick and beautiful way to have one! First, make sure you have a Canva account which is free for educators! You just need to use your school email to open the account.
Follow these steps :
Open Canva.
Click on “Create a design” and search for “website”.
Title your website.
Choose a template or customize your own by searching on images in the “elements” section.
Add the titles you want. Choose your colors, fonts, and images.
Always click on the plus symbol to add more pages or the three dots to duplicate a page.
Once you have all your pages, have fun adding content to them! Add pictures and link them to videos on YouTube, websites or other platforms.
Get ready to publish your website. Choose “Classic Navigation” for a better look. Click on “Open Website”.
Share the link with your students’ families!
You can also resize your website to use on different devices. Let me know when you create your own website!
I might be going back to the beginning of my teaching career (when I was a teacher traveling from classroom to classroom). I did it for about 8 years in Boston and for a few months in the school where I currently teach due to some renovations.
A few years ago I wrote a post for traveling teachers, but a lot of things have changed since then and now that I am looking into possible options because I might become a traveling teacher again, I thought it might be nice to share with you what I have been exploring.
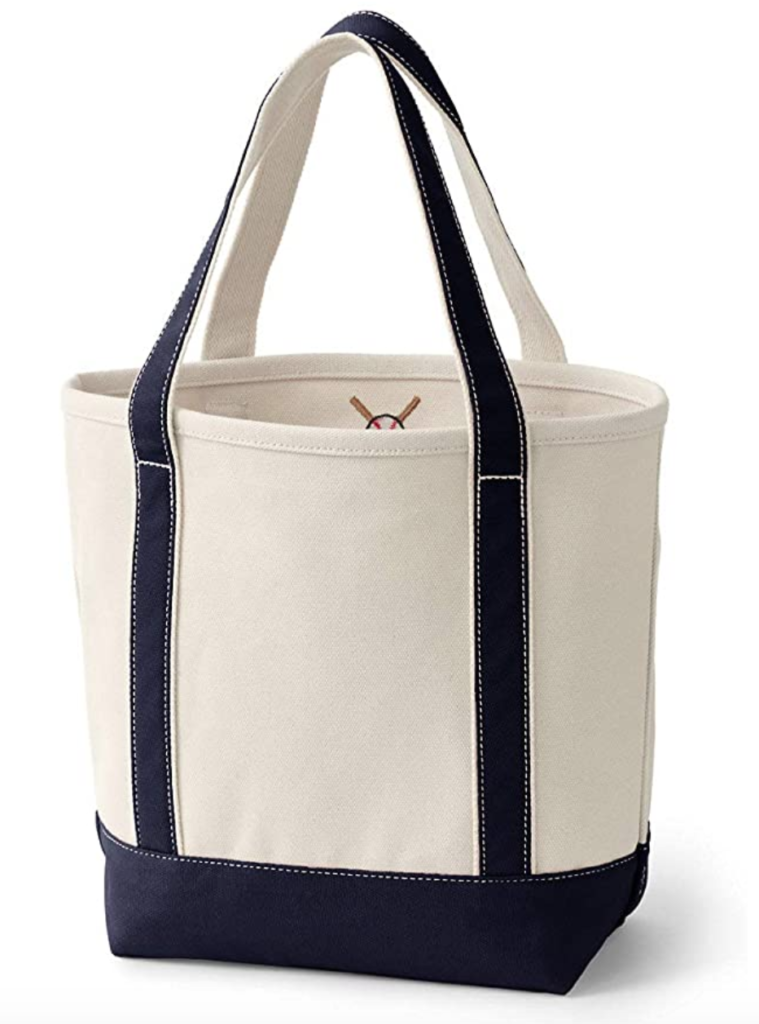
My experience as a traveling teacher has mostly been using hard tote bags since they can easily stay open. I had the one in the picture (size L) below and I really liked it because it also had pockets inside. As I mentioned in my older post, I used one per grade with duplicate materials.
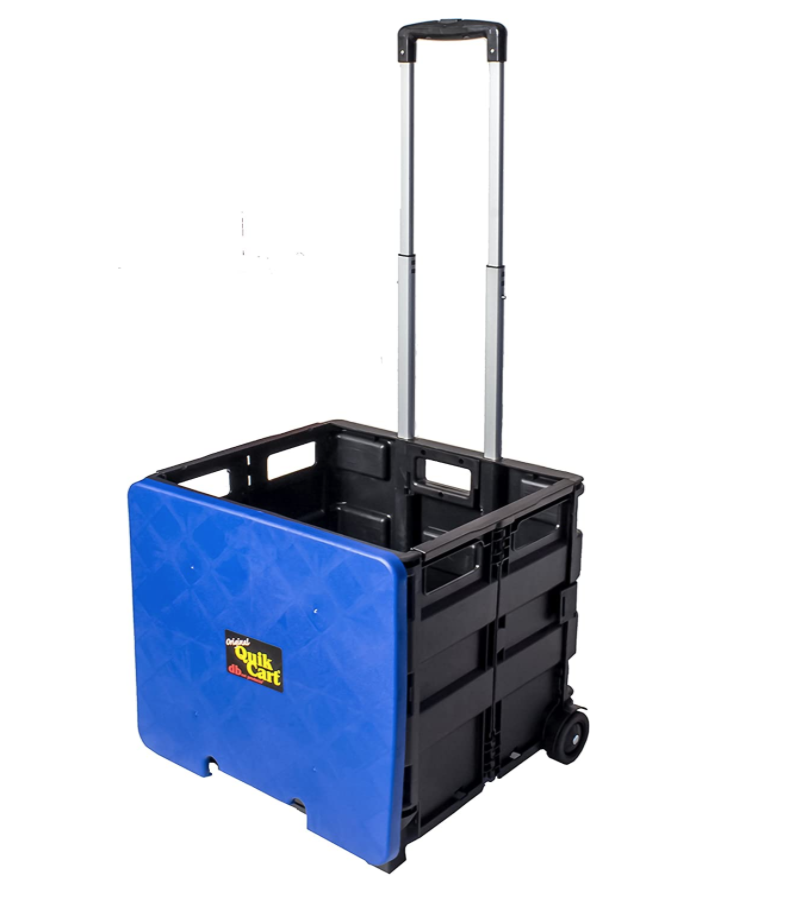
I also used a collapsible cart to give my shoulders a break. I had to travel between different buildings, so sometimes it was not great when there was snow on the ground, but it was still handy when the weather was nice.
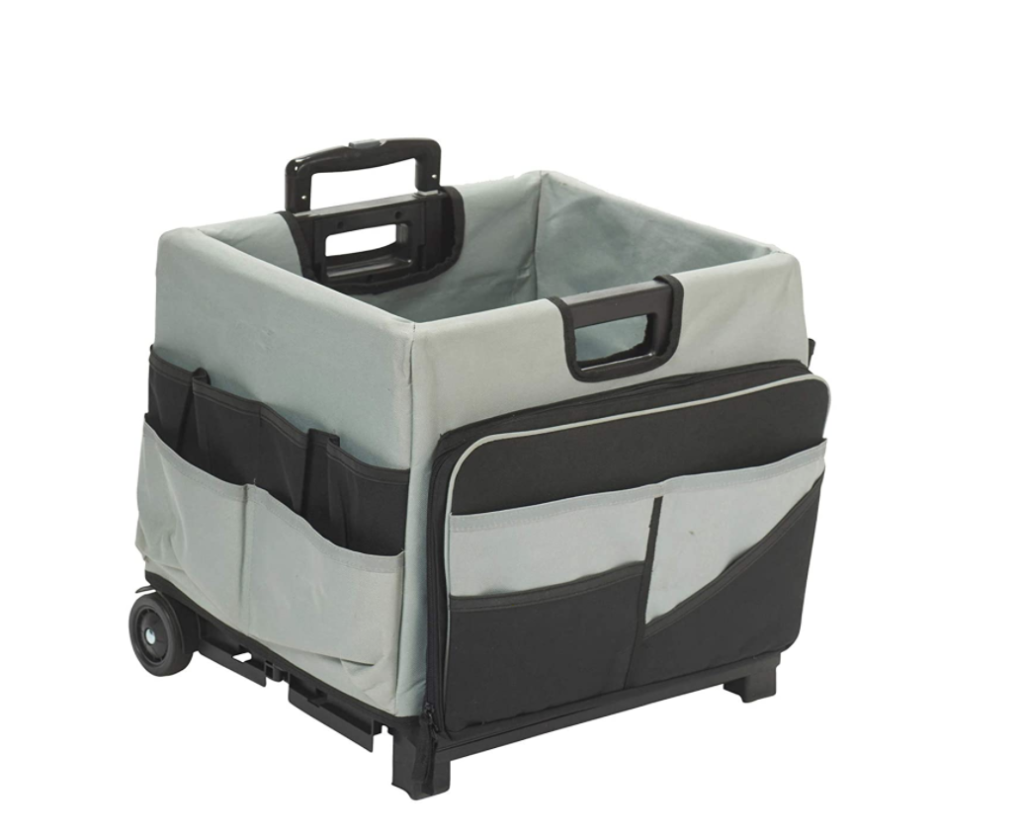
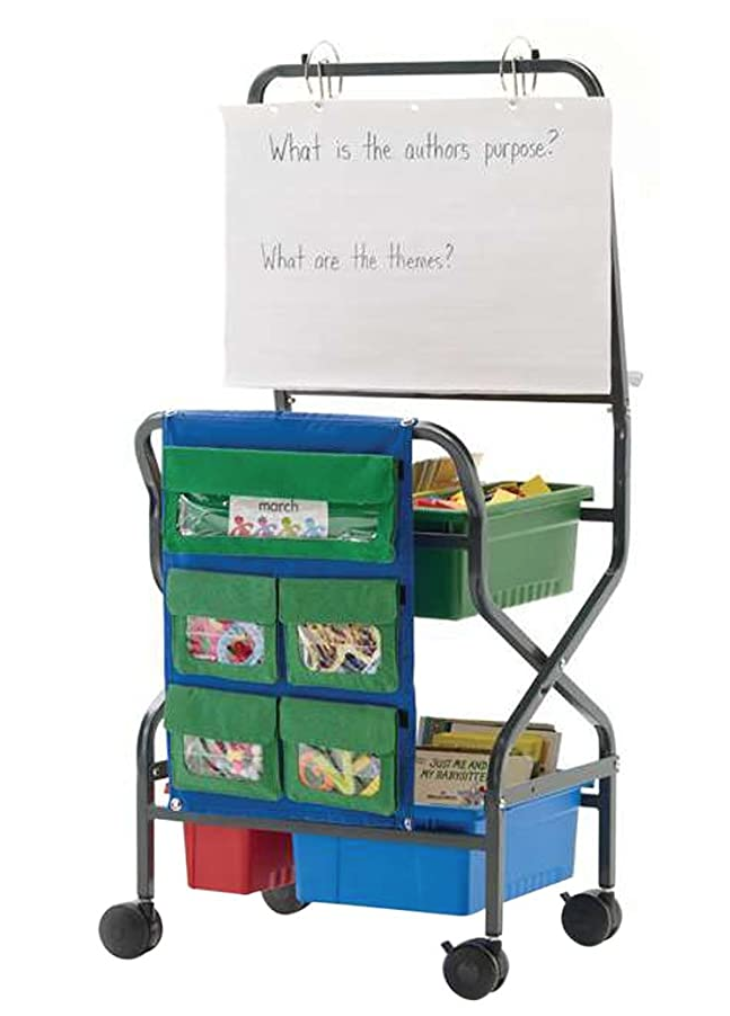
I wish there had been something like the cart below when I was traveling. I like that it has many pockets to hold tiny things like a laser pointer and markers.
In my current job, I had to travel for a few months during my first year, and I had a cart like the one in the picture. To be honest, I used it for about two months because I was not comfortable taking it to other classrooms and it made a lot of noise while I was going from classroom to classroom, so I went back to tote bags.
If I end up traveling from classroom to classroom I think I will keep a tote bag and the awesome rolling cart with organizer set. I think I will carry fewer manipulatives since, due to the current situation, I won’t be doing activities where the children have to pass anything around. I will use Google Slides and other online resources to each and will use the classroom’s projector and keep some flashcards because you can’t trust technology 100%! I will also have a few puppets to bring smiles to my younger students! And yes, since I love telling stories while drawing, that will be one of my most valuable teaching tools!
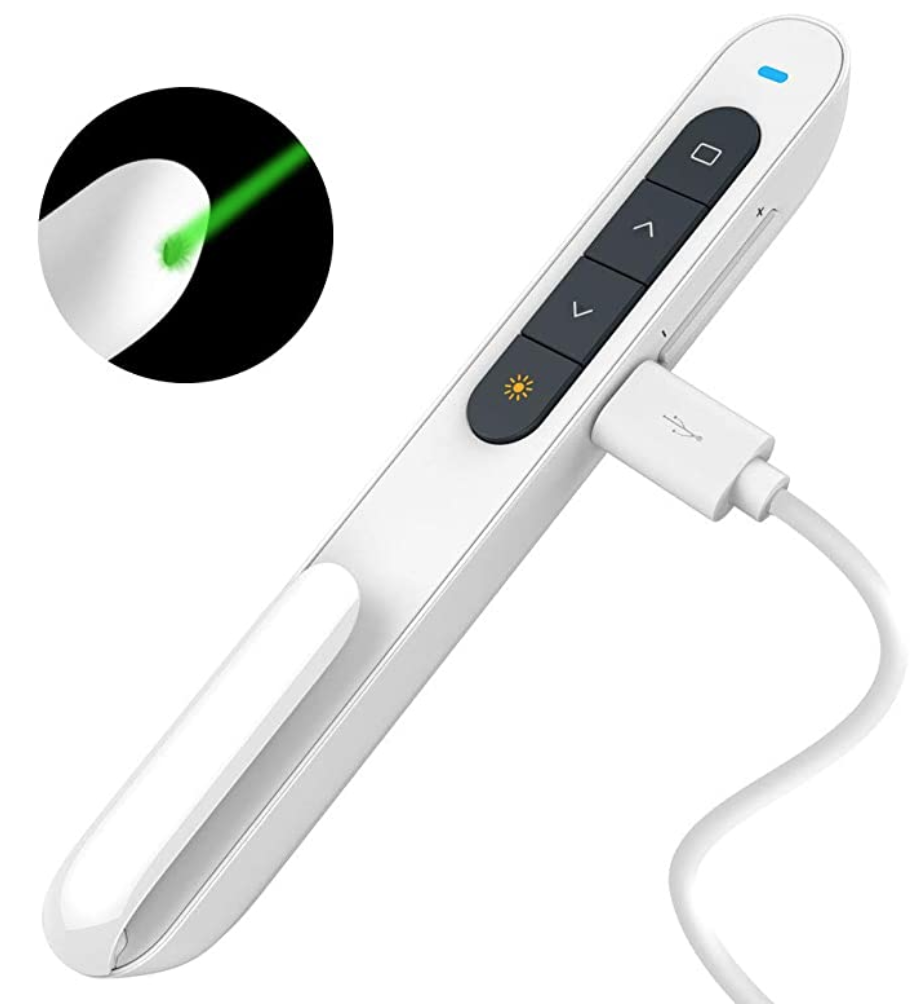
I will also carry my awesome laser pointer. I can’t live without it! I like this one because it can be charged and I also like the green light.
And we all know that we need to wear face coverings and carry wipes, hand sanitizer, some gloves, our own markers, erasers, a lot of patience and love! If you are a traveling teacher this year, please share in the comments what your plans are!
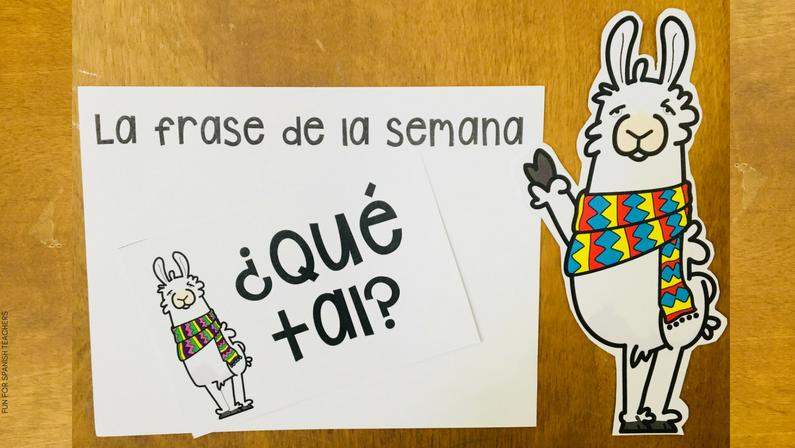
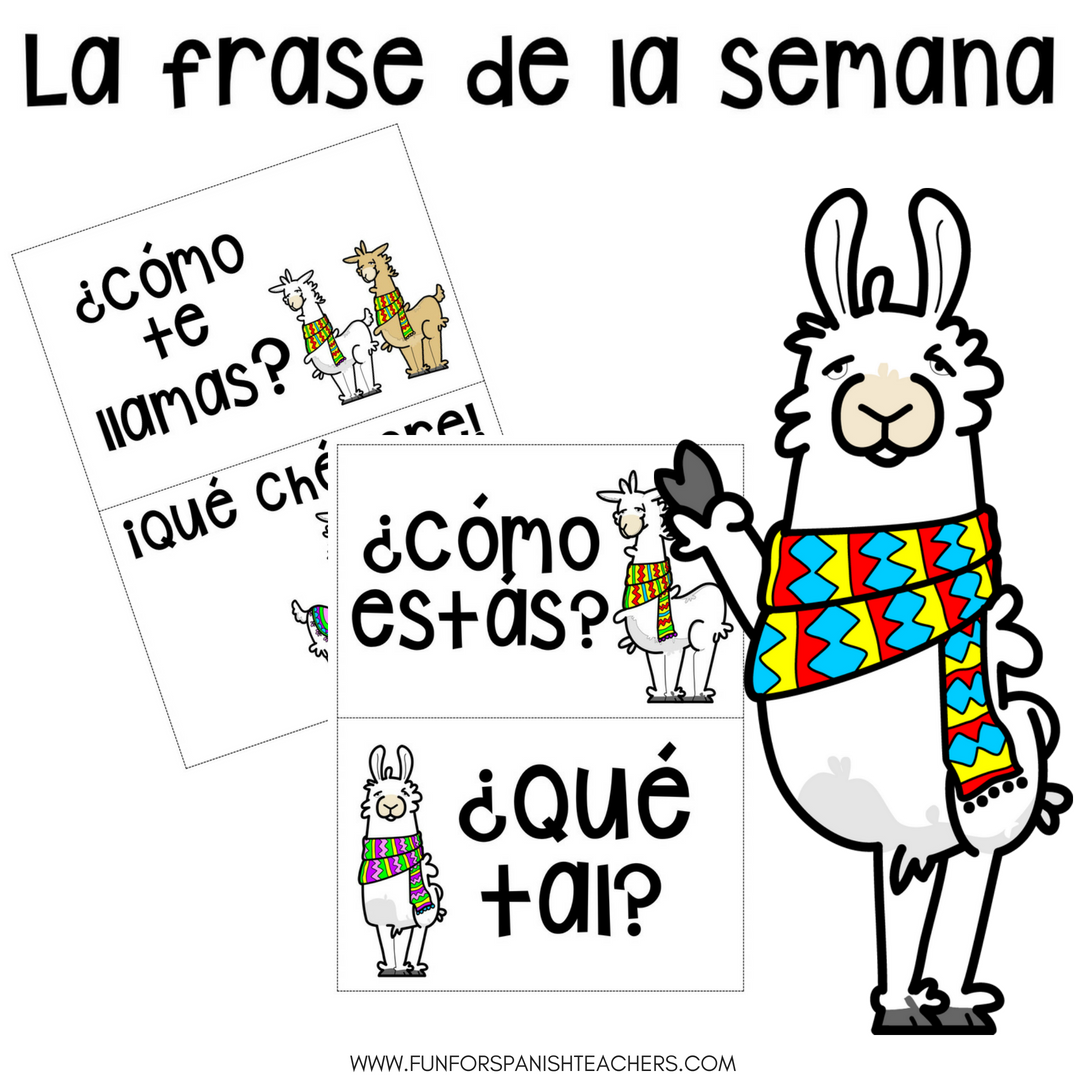
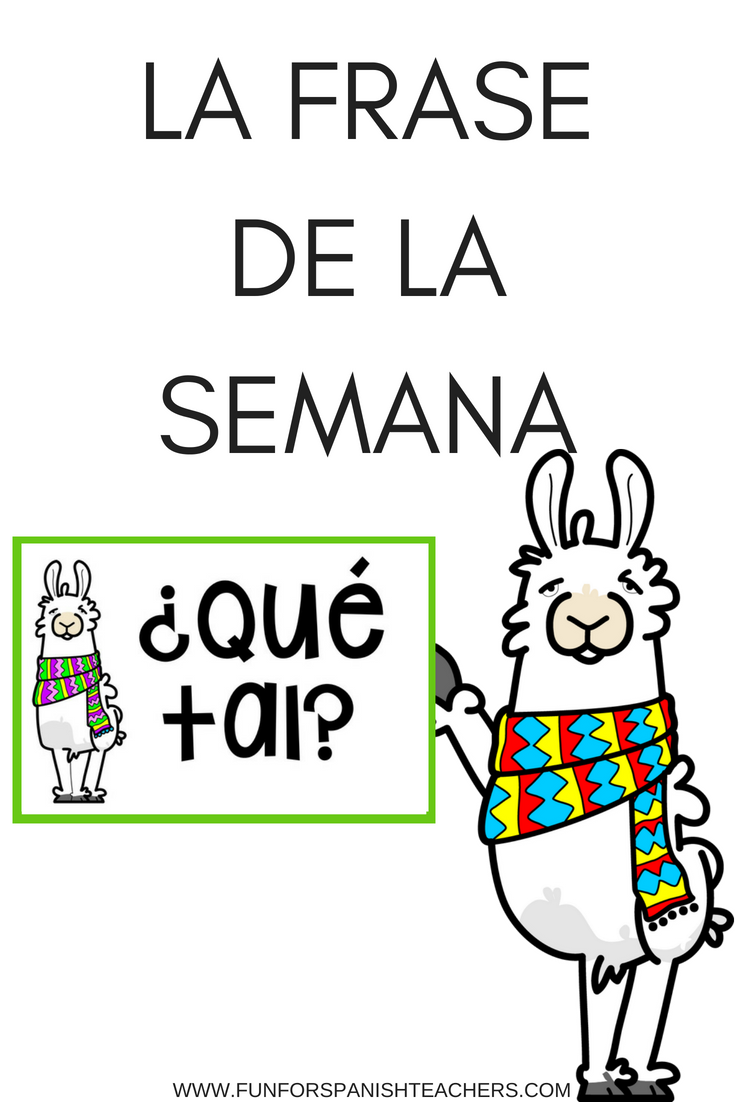
“La frase de la semana” or phrase of the week is a great opportunity to teach useful language. I try to use phrases that I know we can incorporate into our classes. I teach grades K-5, but I only use it with my students in grades 3-5.
We make it part of our routine. I keep a poster with the phrase of the week taped on the door. I sometimes teach classes back to back, and having this routine can buy me an extra minute while I am getting everything ready for the next class. My students wait for me in a line outside my class.
La frase de la semana serves as their password to enter the classroom. It takes about two minutes on average, so children know that they need to find their place quietly in the room and read the “Plan de la clase” to find out what we will be doing (although there are days when this goes more smoothly than other days). I don’t have a variety of classroom jobs because I find the logistics hard for me, but I do have a “secretario” and “secretaria” who help by passing out materials when needed, sharpen pencils, turns lights on and off, and so on. After children have practiced with it and have the routine down pat, I sometimes ask the secretarios to help me by staying by the door and listening to their classmates say la frase de la semana. I love when they start using those sentences in natural ways and in the context of the class. It’s magical when I start to hear spontaneous remarks like “¡Qué chévere!” or “¿Qué tal Sra. Gómez?” when students see me during recess or in the hallway.
Here are some of the phrases I have used:
¡Qué bueno!
Para nada
¡Genial!
¡A mí también!
¡Qué chévere!
¡Me encanta!
¿Qué pasa?
You can also find more phrases on “Mis cositas.” Lori Langer de Rámirez is so generous and shares tons of resources on her blog. Make sure to stop by her blog and download “Passwords perfectos.”
Ben Slavic also has a wonderful site with tons of CI/TPRS resources. He shares a list of great rejoinders that can also be used with la frase de la semana.
Feeling ready to start with la frase de la semana? Download this free resource that will help you get ready!
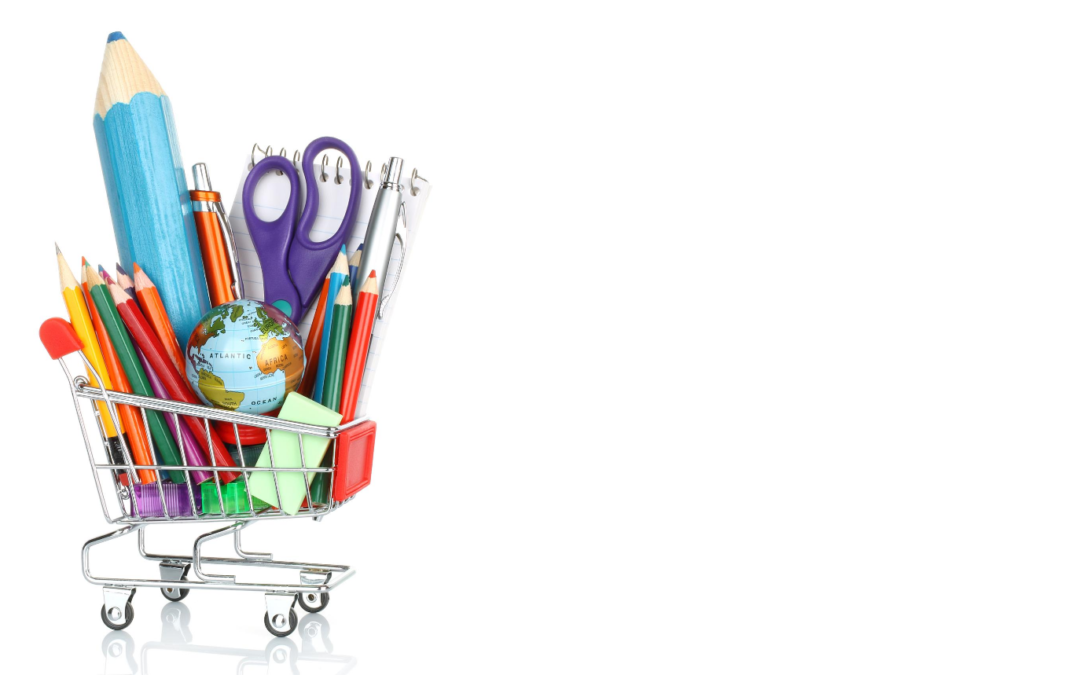
This a list of what I have in my classroom and can’t survive a school year without any of these materials.
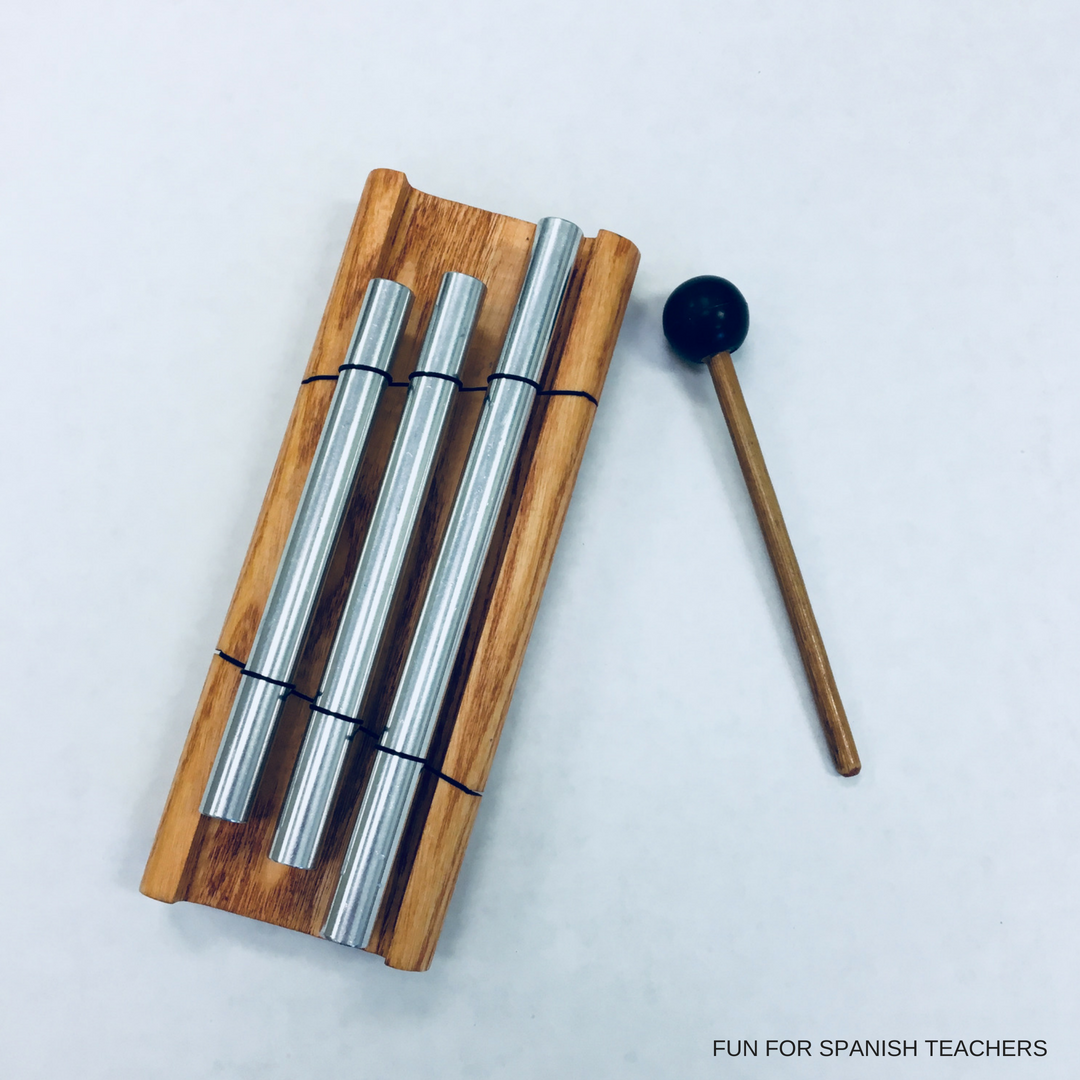
Chime: Sometimes we need breaks from using call-and-response chants or clapping our hands. I have found a three tone chime* that works well because it gives enough time for my students to settle down.
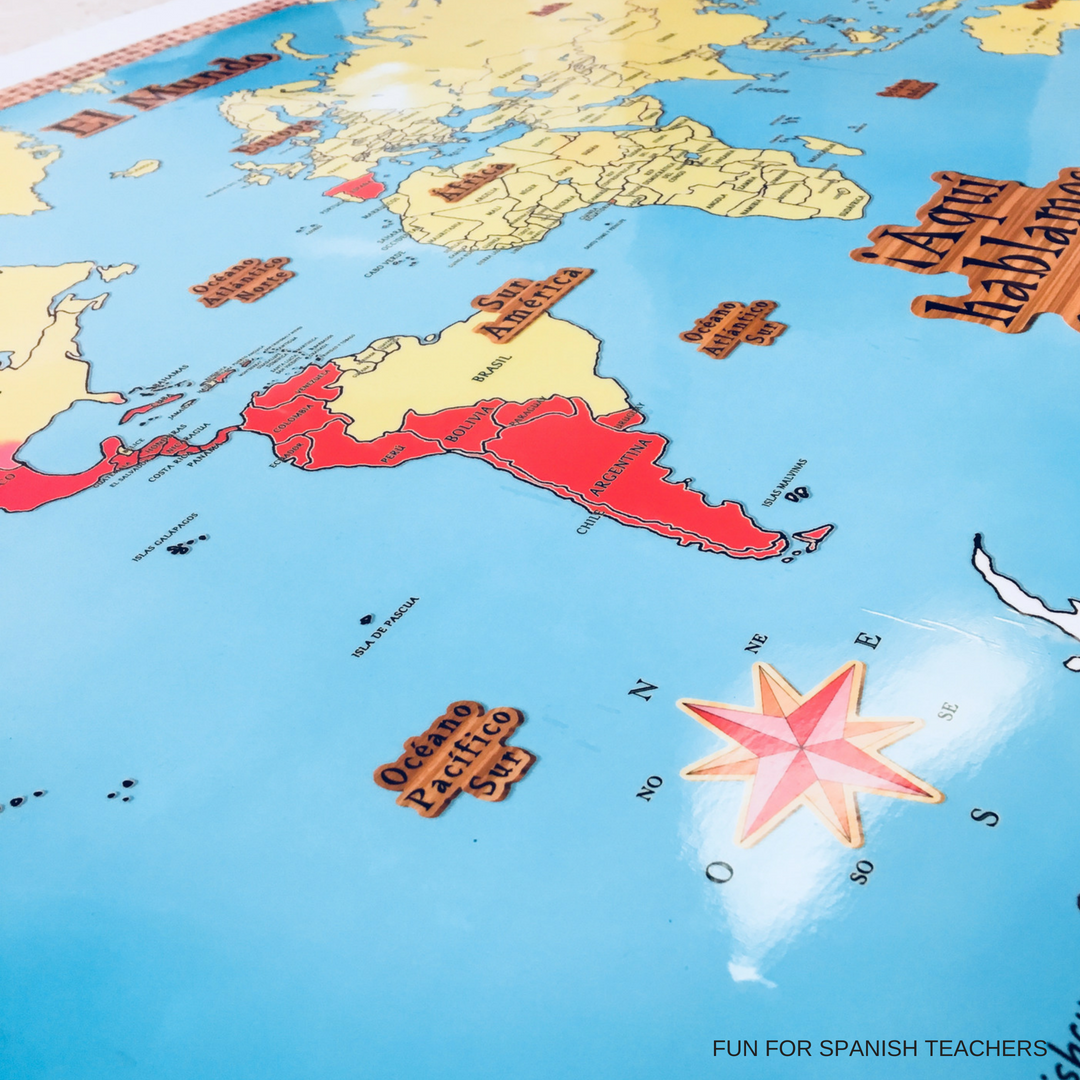
Map: I had a hard time finding a map that was simple enough for my elementary students. Luckily I came across this map on Pinterest, and it has been the best purchase ever. You can find it at Spanish Cuentos.
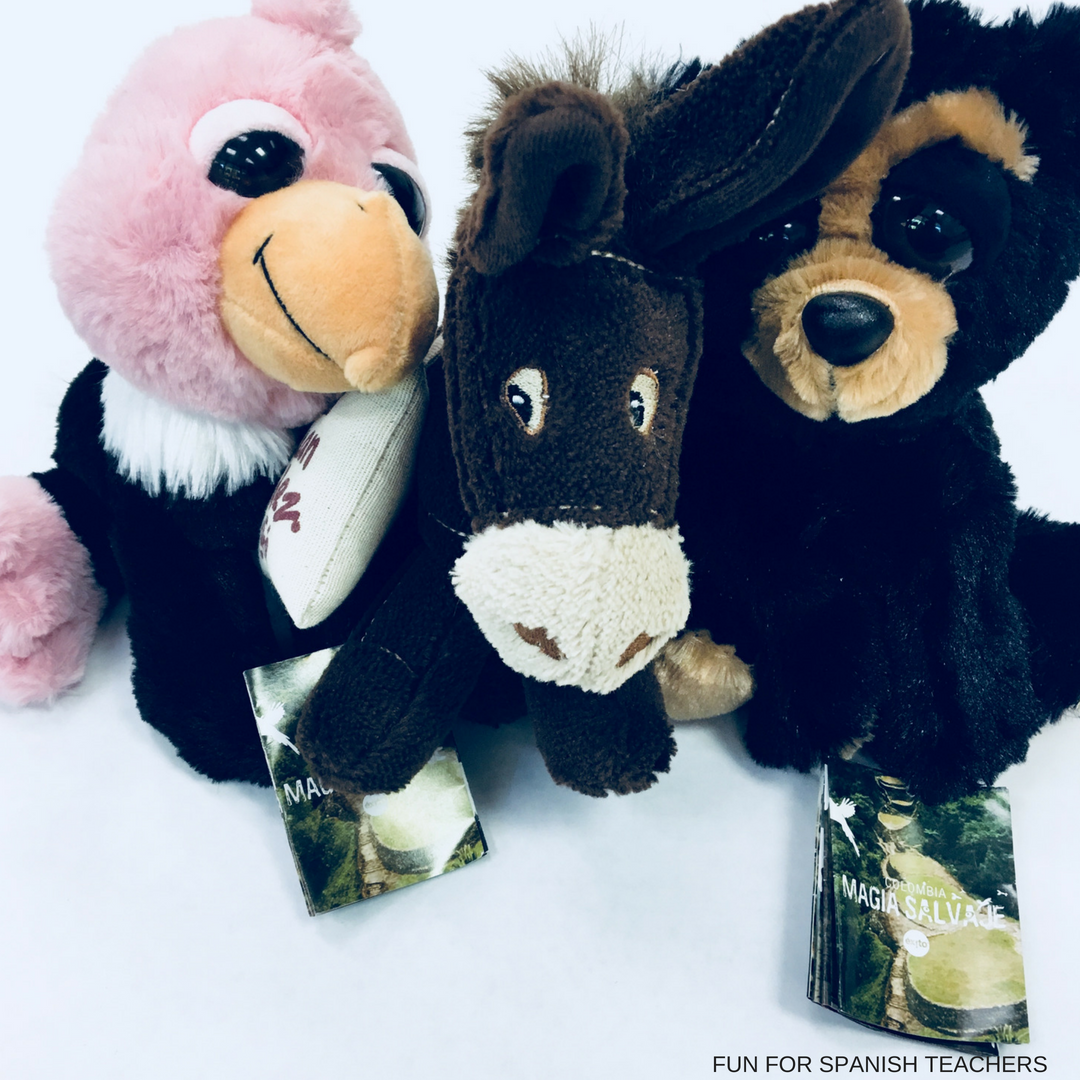
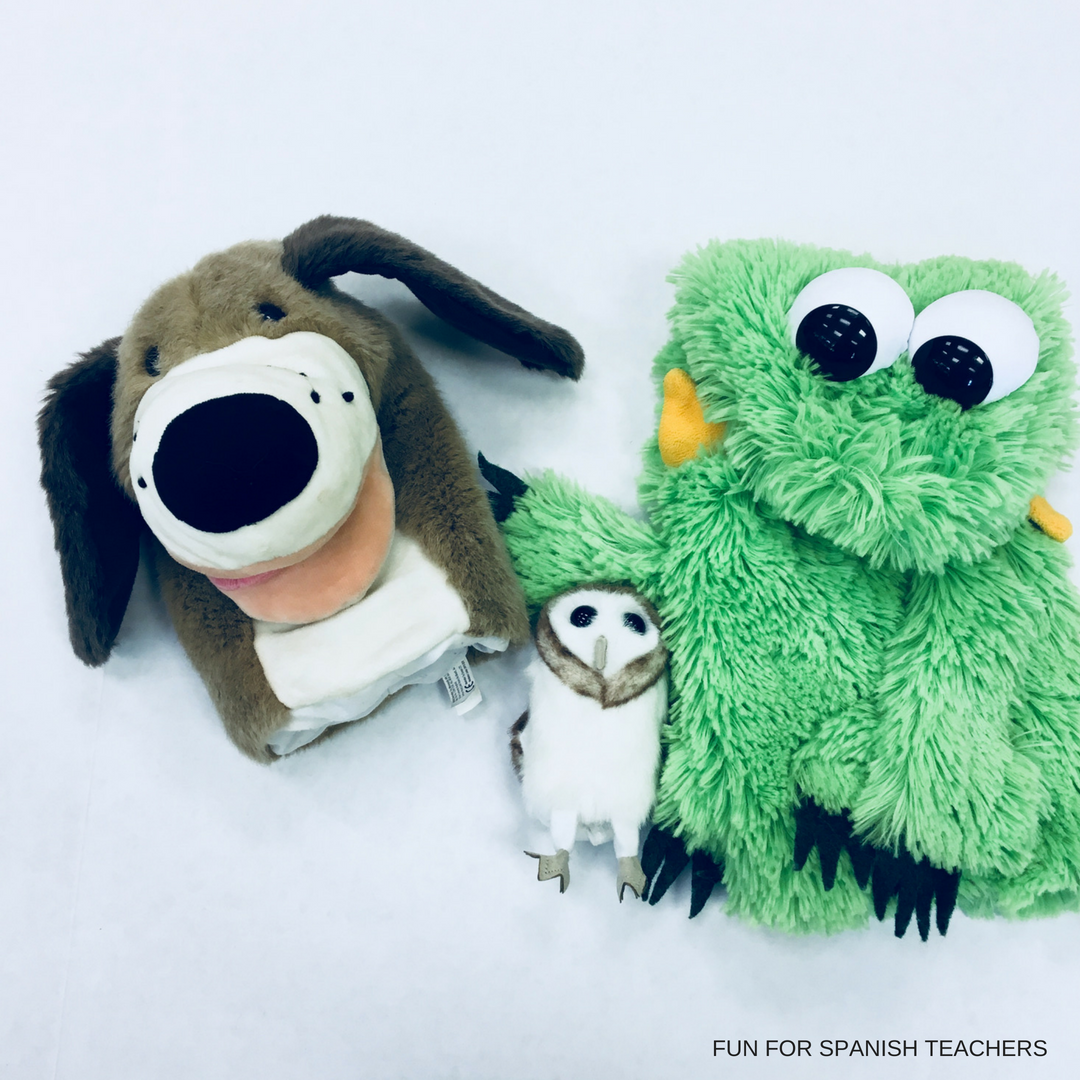
Puppets and Plush Toys: Puppets and plush toys are a great tool in language teaching. I love when my students make connections with some of them. They become one more member of the class. Visit my post where I talk about the use of puppets in a world language class.
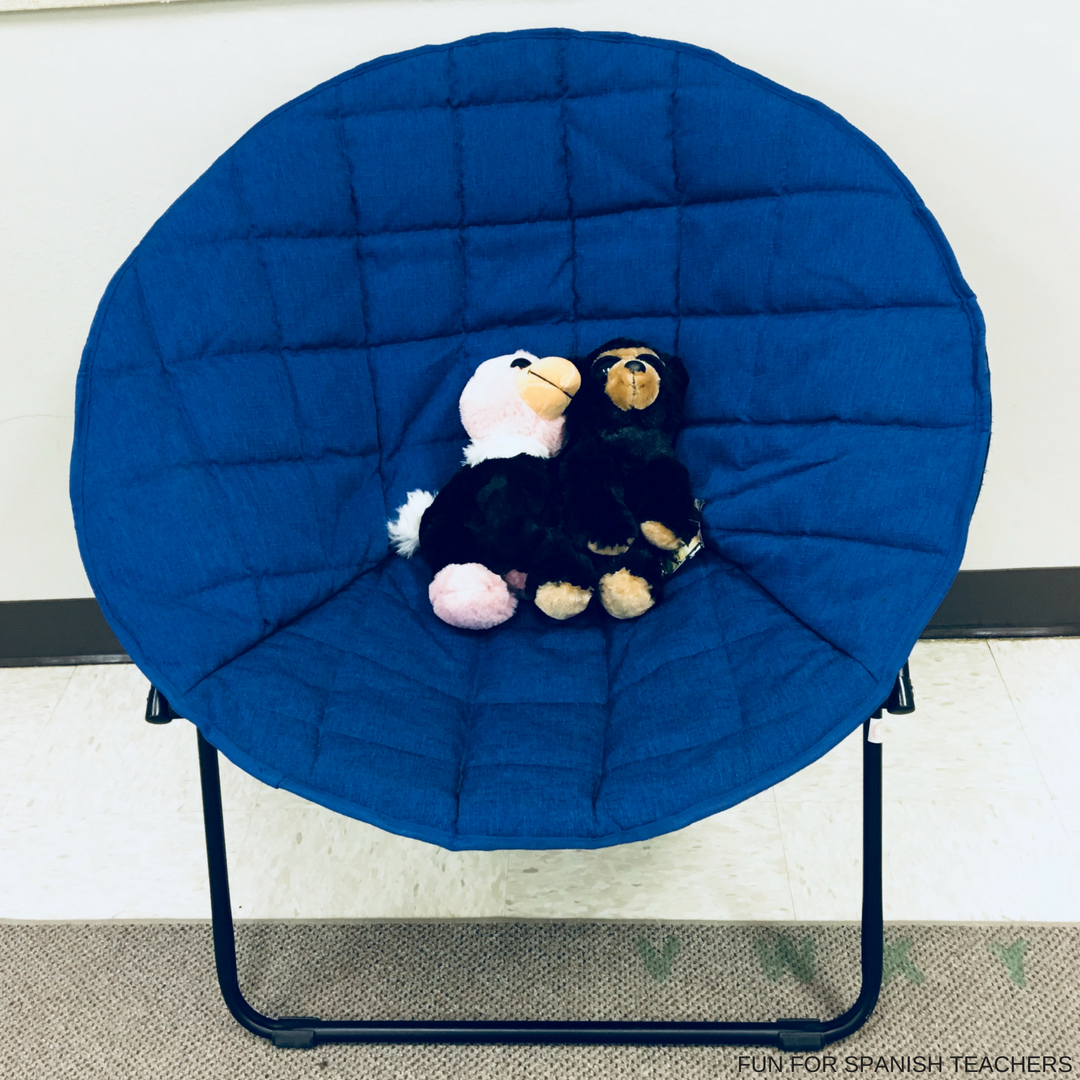
Special Chair: I have a chair that my students use when we sing to them to celebrate their birthdays in class. They all look forward to having a chance to sit on that chair in class. They also get a small gift from me which is usually a pencil, eraser, or small craft from Colombia. They also get a birthday certificate. Click here to download some free ones for your classes!
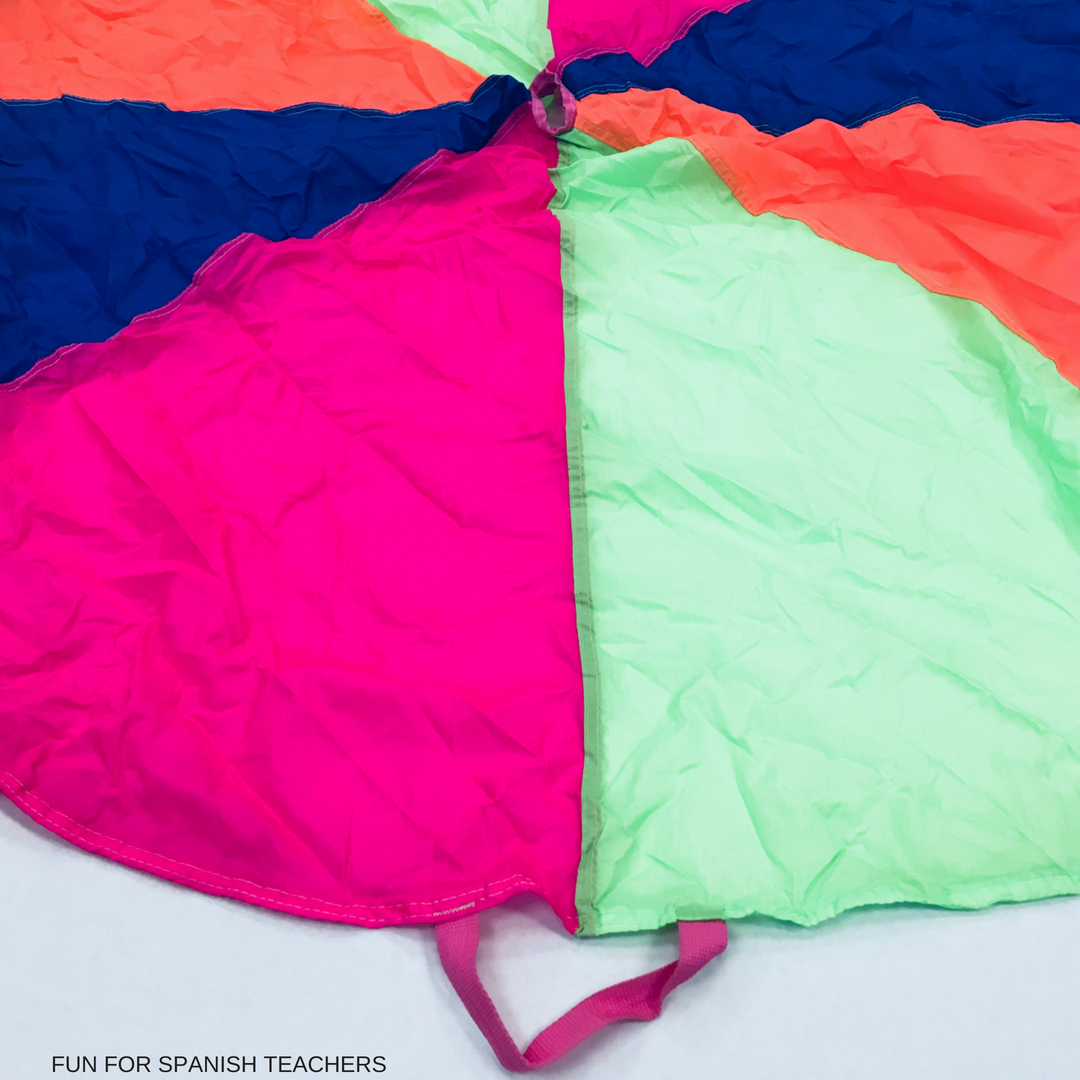
Play Parachute: Every single one of my students seems to love parachute time, no matter how old they are. It’s always fun to use parachutes for a brain break. I have written a few posts about how I use them in my classes:
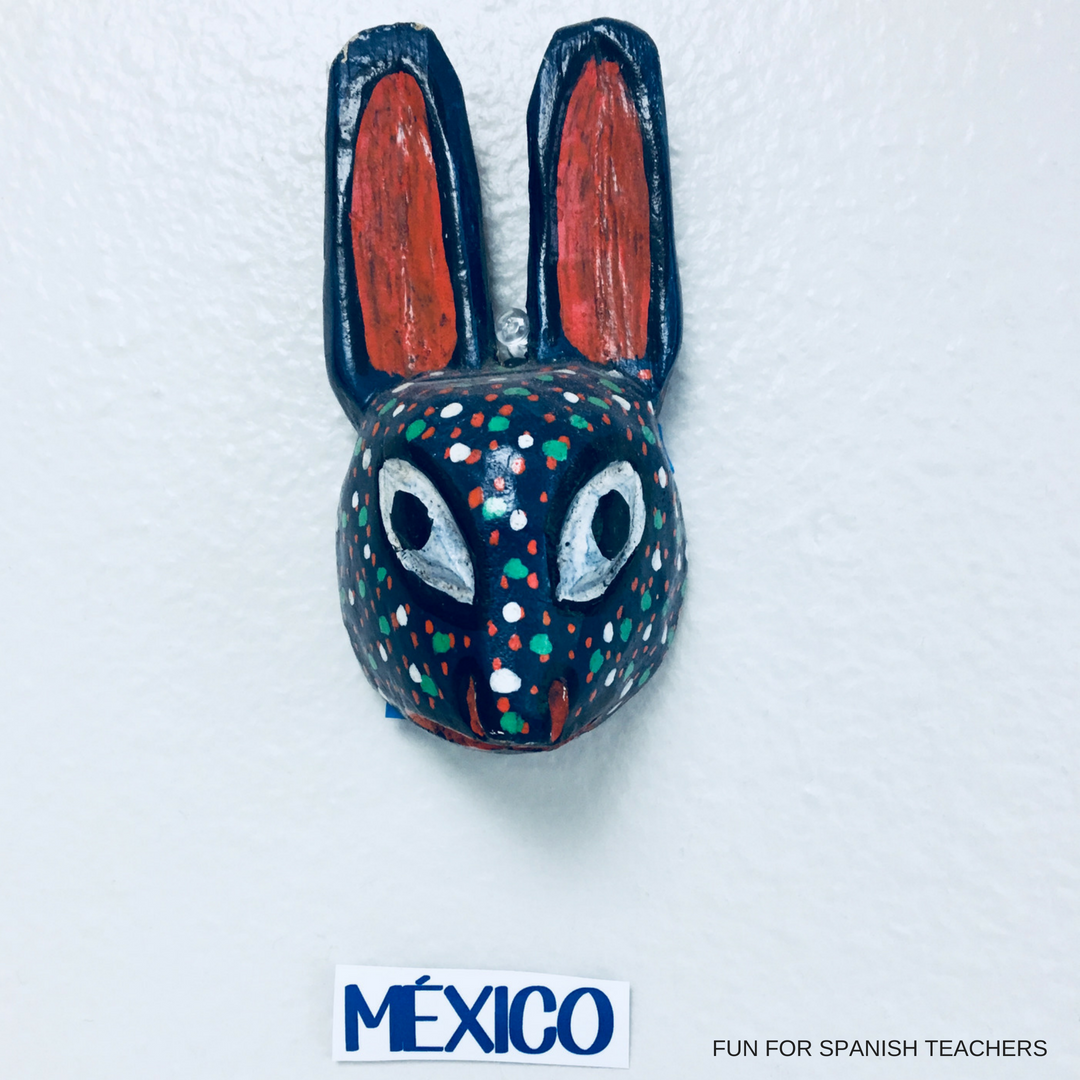
Authentic Art: I love displaying art from different Spanish speaking countries. I usually label items to show where they come from.
Favorite Music Playlist: Thank goodness for YouTube! I love how you can easily make lists of your favorite songs. I like creating playlists by grade levels. Here is a list of some of my go-to channels:
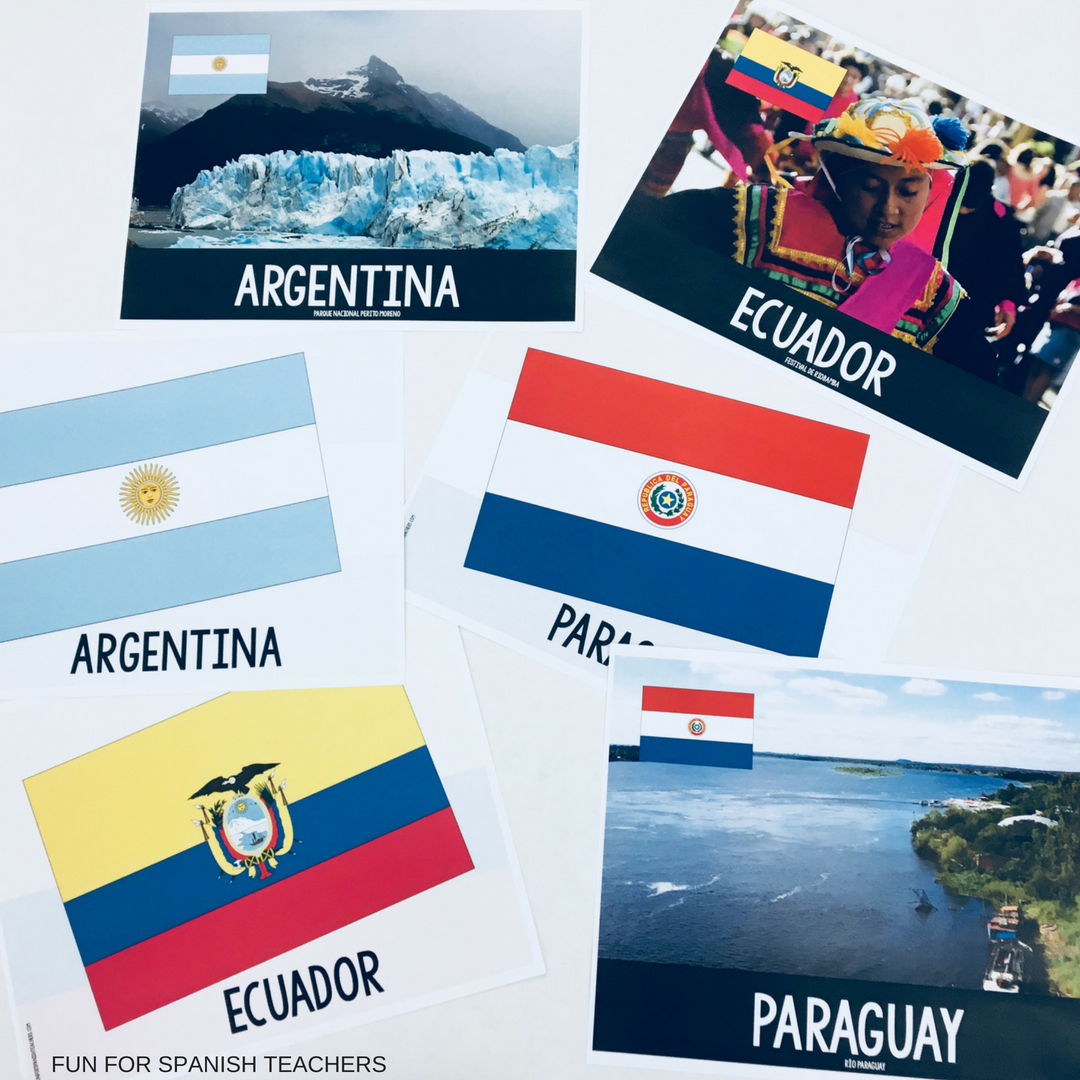
Flags: I have flags and posters from the different Spanish speaking countries. You can display them all at once or take them out one at a time when you do the country of study. This pack is available on Teachers Pay Teachers.
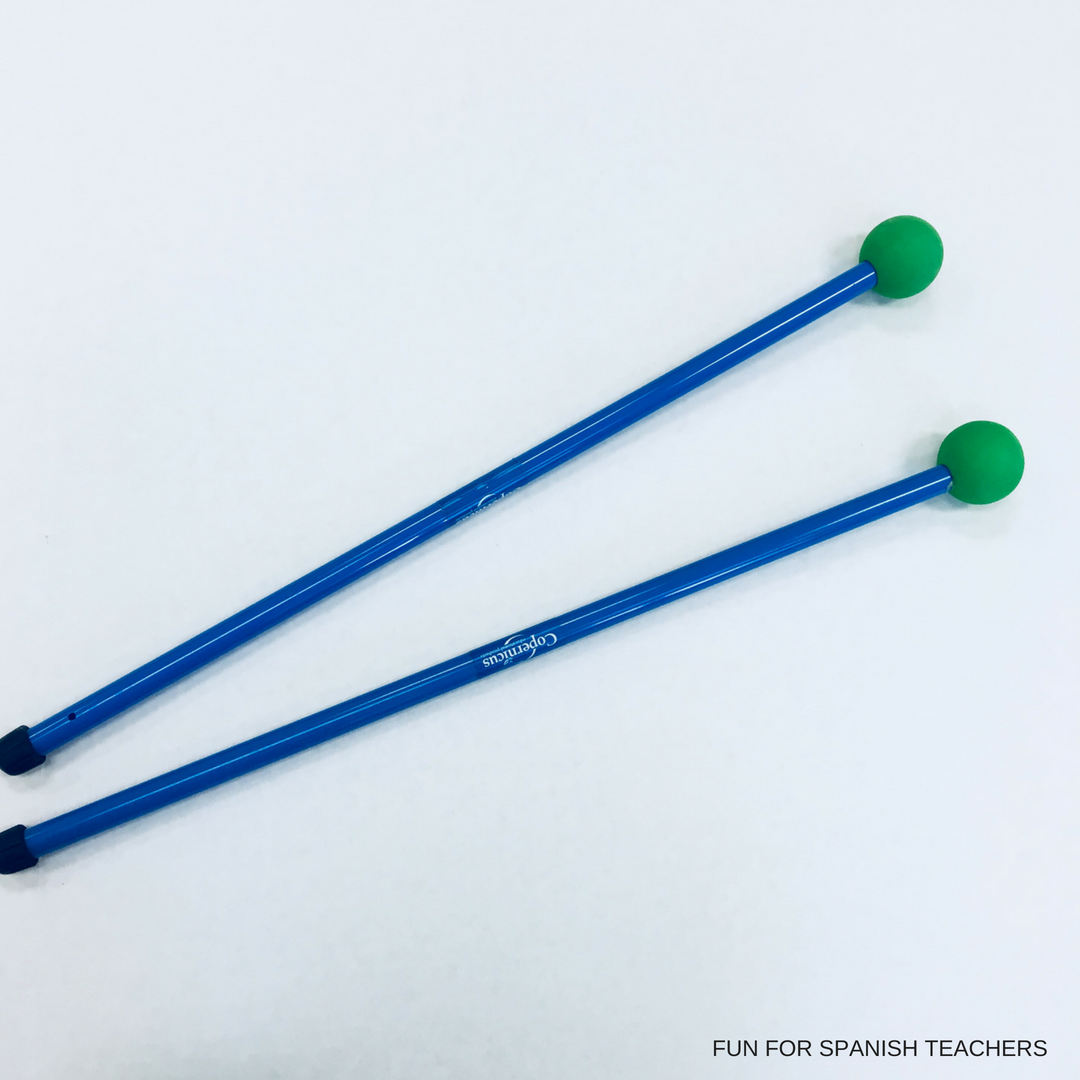
Pointers: I found a really awesome set of pointers* that I use while looking at our “Plan de la clase” as well as when we play interactive games on the Smart Board. These ones have been the best so far! I have had them for about two years now:
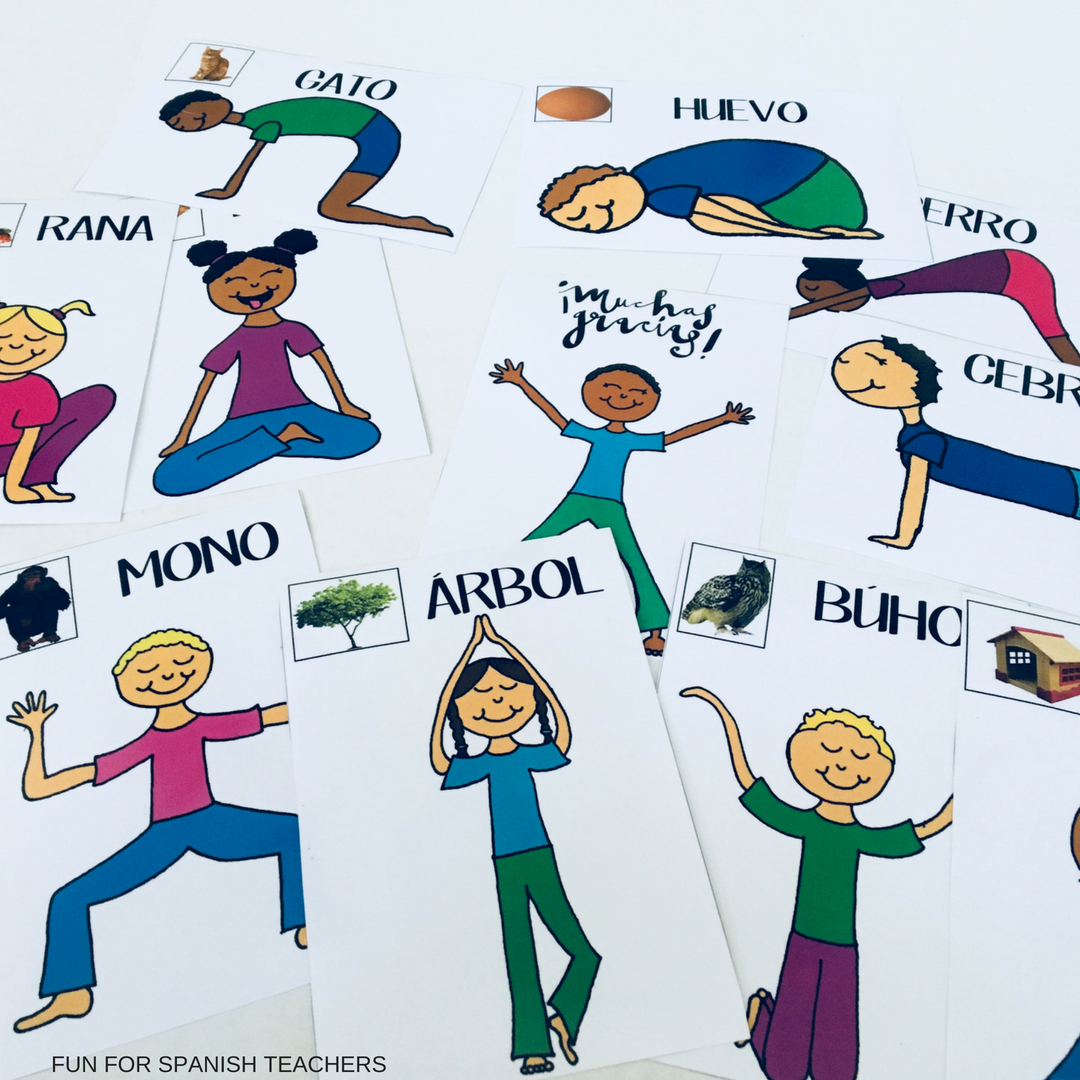
List of Brain Breaks: Brain breaks are great not only to get your students’ attention back, but also for you to take a break as a teacher. I keep a list of brain breaks and yoga cards handy. Download free yoga cards here!
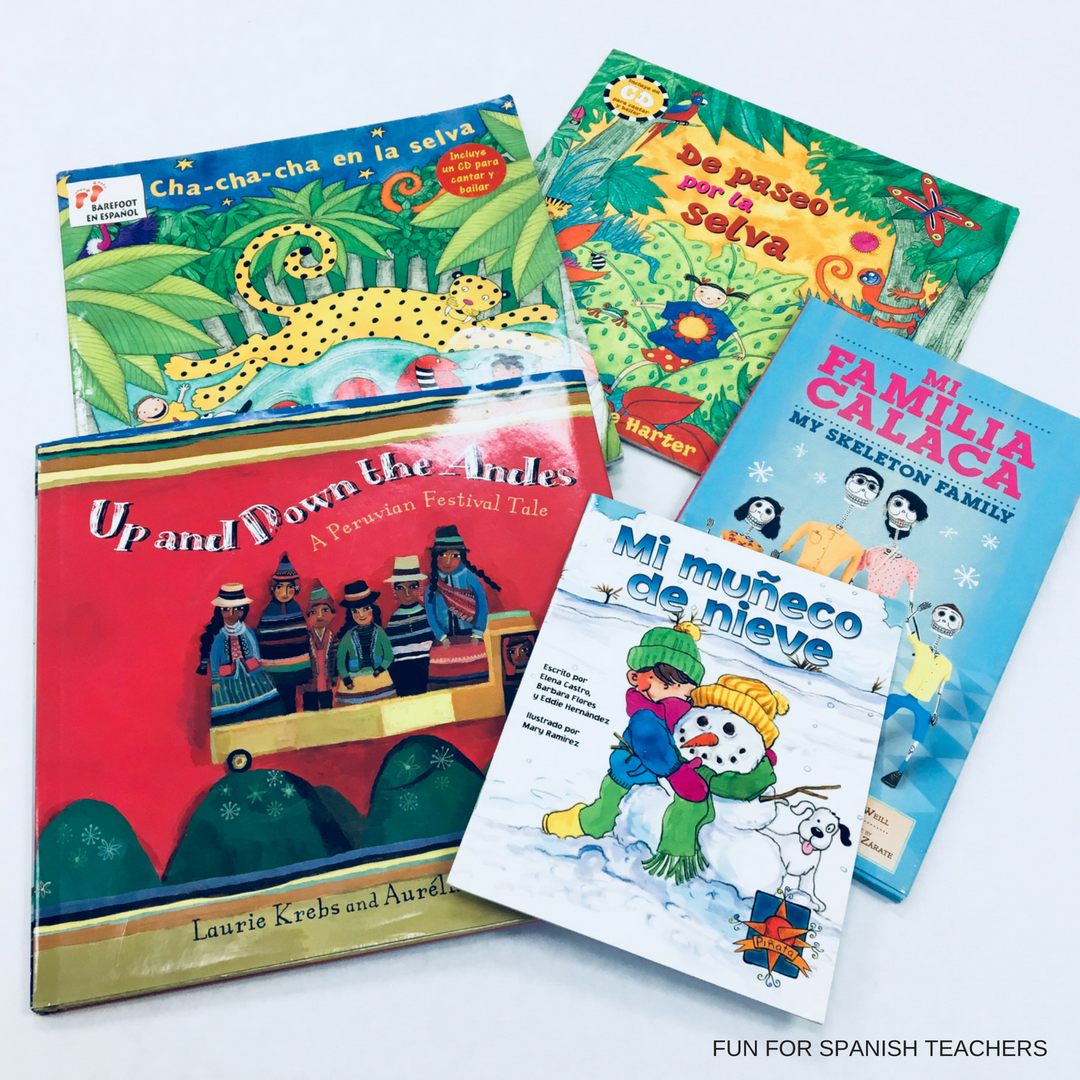
Simple Picture Books: Last year I started a library in my classroom. So far the books that have worked best are books with minimal text and also books that the children are already familiar with in English.
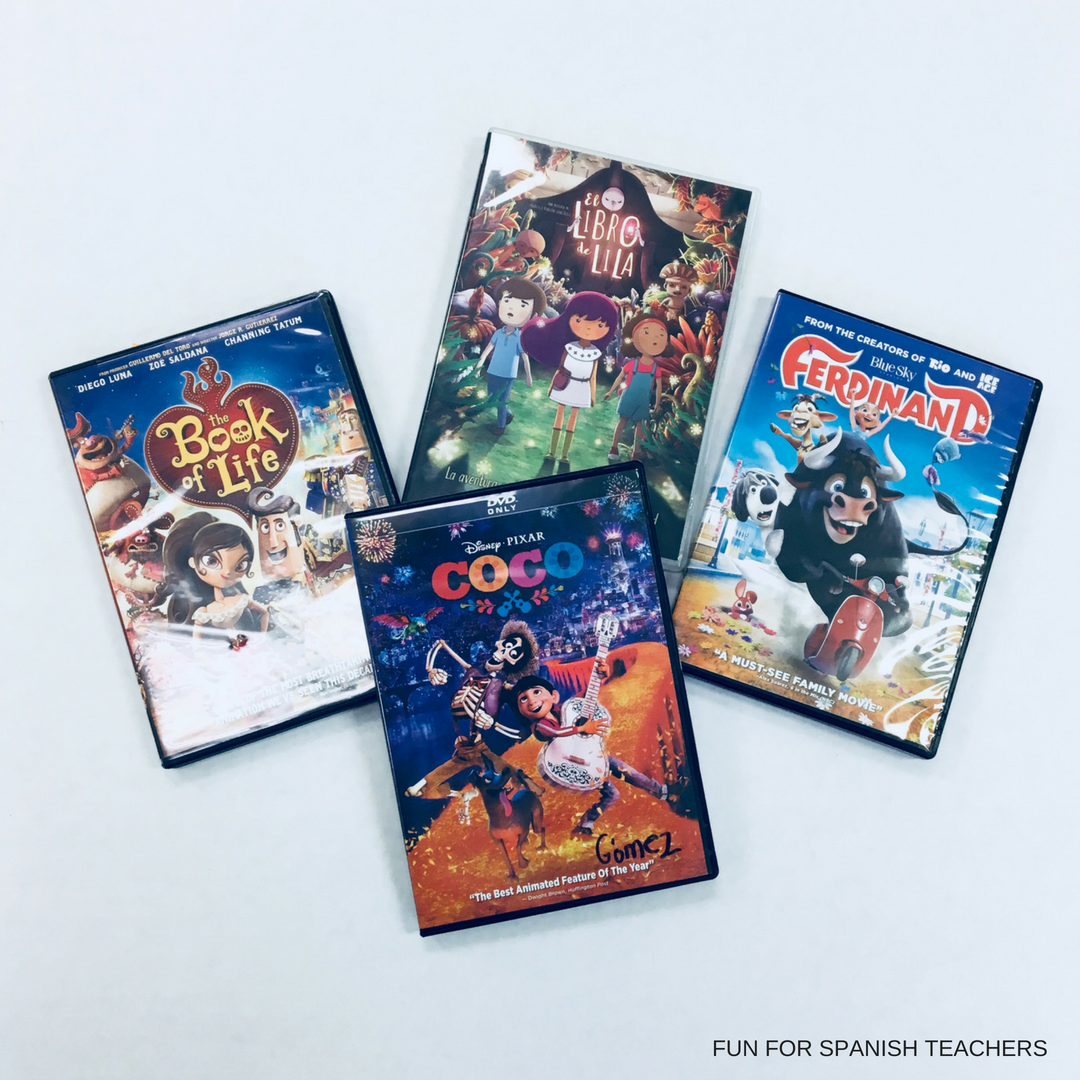
Movies: Sometimes I like using movies right before the break when I know a lot of my students will be missing. I also use them when I am out and can’t find a sub that speaks Spanish, or just being honest, to take a break!
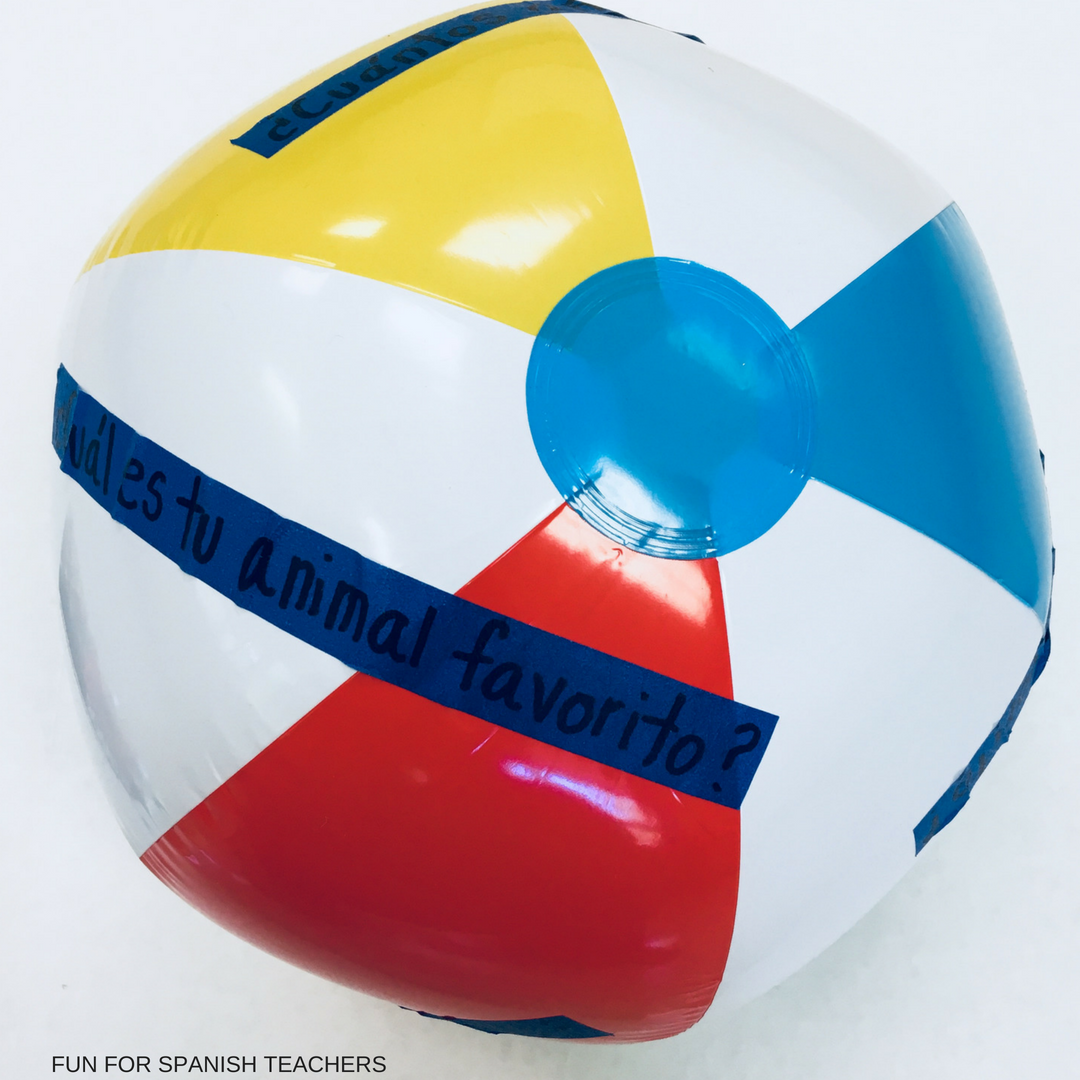
Balls: Yes, balls of different sizes to play games or ask questions!
Instruments: Playing with these is something my younger students really enjoy!
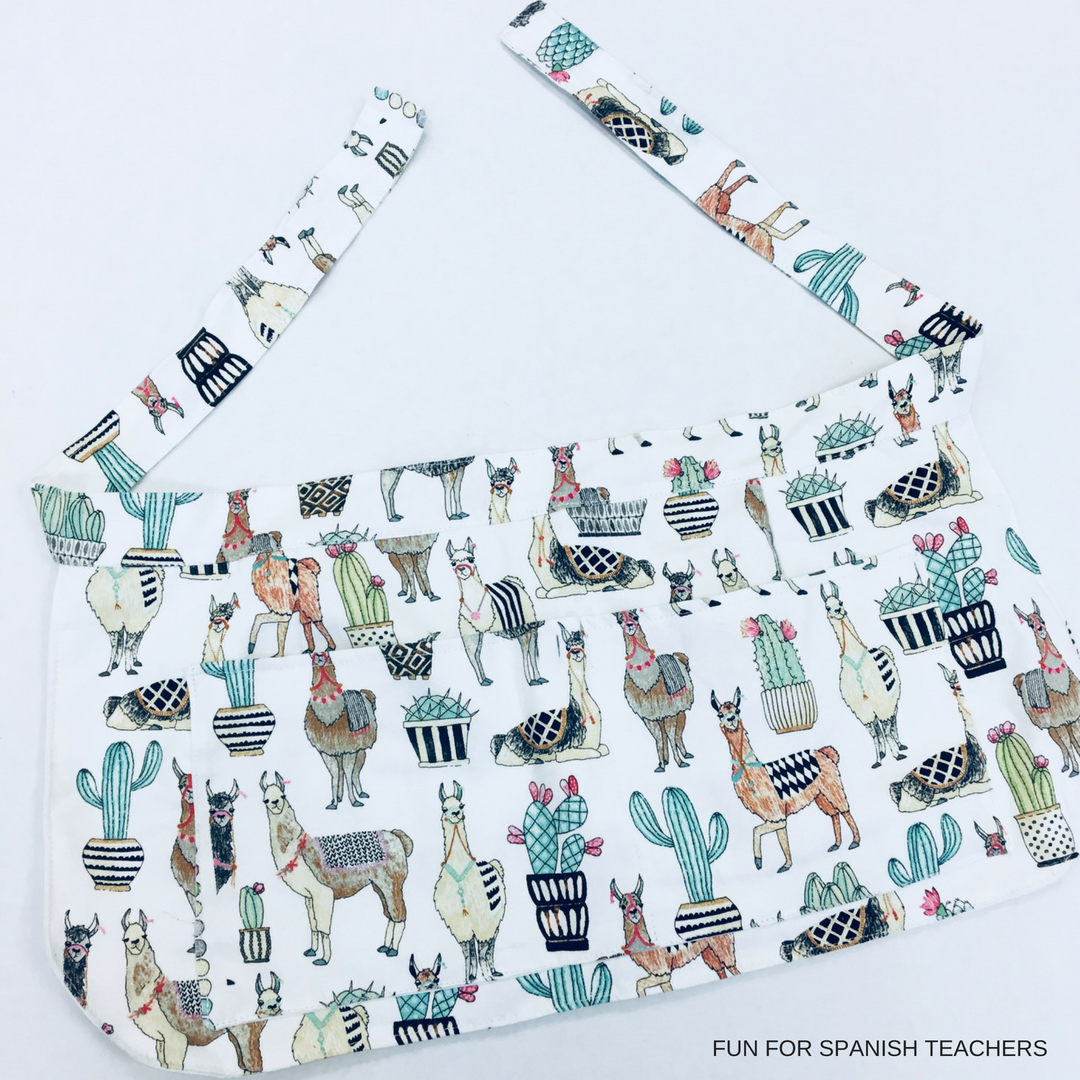
Apron: This is not a “must,” but it has been great for me to stop putting things in my pockets when I am teaching. I used to always end up emptying my pockets of an assortment of things at home that should have stayed at school instead of hitching a ride with me – things like tiny pointers, markers, pencils, and the classroom keys. This is the one I plan to use this school year. I am especially excited about the llamas on this one!
What is something you think I should add to this list? Please feel free to leave your suggestions in the comments box.
There is nothing children enjoy more than pretending! Role playing games are such valuable tools for teaching languages. Planning a virtual trip requires some planning. You have to make sure the content is suitable for the level you teach.
Introduction of a country or cultural activity:
1. Passport: You can create a simple template that your students will have to fill out with basic information such as name, age, and country where they were born. They can draw a small picture about themselves.
2. Ticket: The ticket will have their seat and arrival country.
3. Sitting on an airplane: You may need to adapt this based on your space and the amount of time you have available to set up. I usually like making single lines and numbering the chairs from 1 to 20, depending on the number of students you have. Each student gets assigned a number. You can have two students pretend being the flight attendance to greet everyone when getting on the plane. This might take up to 5 minutes. You can also pretend that you have a pilot who will welcome everyone and let them know where they are heading to. For example, “Buenos días, Bienvenidos al vuelo de la clase de español. Vamos a Colombia.”
4. Google Earth: This requires some advance planning. You might want to choose the pictures of the places you would like to visit. I found a post written by The Teacher’s Prep with great information on using Google Earth: Create a Virtual Trip Using Google Earth
5. Choose a few short videos about the country you plan to visit.6. Postcard: Have the children make a postcard that they can pretend to send to a family member. The postcard can have information about what they learned during the virtual trip. Steps 4 and 5 might require a few class sessions to complete while the children do the cultural exploration. This also depends on how many times you see your students and the kind of program in which you teach. Some teachers prefer to do the cultural part in English , while others keep the target language basic and at the level of their students. I have a “Travel Set Activity” in my TpT store that I have used successfully with my students. Everything is ready to set up, and it even includes printable stamps that students can add to their passport every time they visit a new country. Click on the picture to learn all about it!
¡Hola! I am Carolina, a Colombian elementary Spanish teacher based in Boston, MA. Fun for Spanish Teachers is the result of my passion for teaching Spanish to children and my desire to inspire collaboration and creativity in a vibrant teaching and learning community. It’s the perfect stop if you are looking for songs, games, teaching tips, stories, and fun for your classes.
To provide the best experiences, we use technologies like cookies to store and/or access device information. Consenting to these technologies will allow us to process data such as browsing behavior or unique IDs on this site. Not consenting or withdrawing consent, may adversely affect certain features and functions.
Functional
Always active
The technical storage or access is strictly necessary for the legitimate purpose of enabling the use of a specific service explicitly requested by the subscriber or user, or for the sole purpose of carrying out the transmission of a communication over an electronic communications network.
Preferences
The technical storage or access is necessary for the legitimate purpose of storing preferences that are not requested by the subscriber or user.
Statistics
The technical storage or access that is used exclusively for statistical purposes.The technical storage or access that is used exclusively for anonymous statistical purposes. Without a subpoena, voluntary compliance on the part of your Internet Service Provider, or additional records from a third party, information stored or retrieved for this purpose alone cannot usually be used to identify you.
Marketing
The technical storage or access is required to create user profiles to send advertising, or to track the user on a website or across several websites for similar marketing purposes.